Acervus Guide: Star Citizen Inventory Tracker
Download AcervusIntroduction

Acervus is a community resource management tool designed to help Star Citizens track their items.
Know what you have, where it is, and how much of it you have. Acervus can track as many characters as you have accounts with all the data ready to view offline.
Getting Started
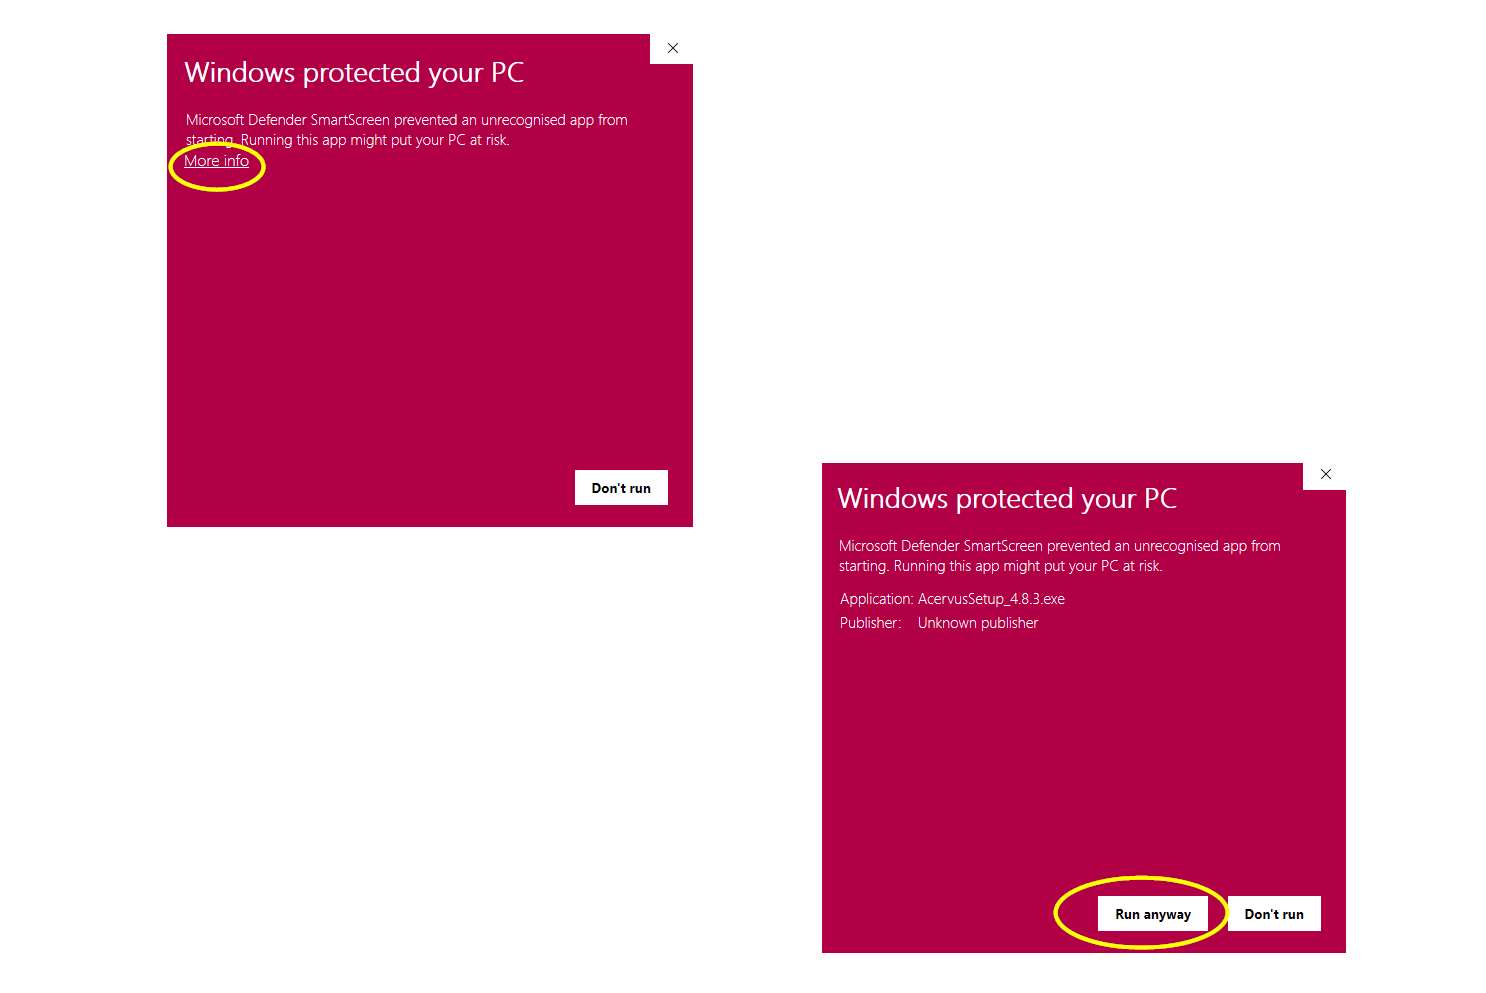
If you run the standalone .exe installer, your OS may vigilantly defend you. This is not a bad thing.
As this is a homebaked bit of software and I'm just a guy putting something together at home to share with the community, I'm not spending money on the code signing certificate at this stage. For this reason there is also a version available on the Microsoft Store for your peace of mind. Both versions contain the same features, the only difference is the installation source.
When attempting to install the direct download version of Acervus on your Windows machine Microsoft Defender SmartScreen is probably going to come to your defence. You can click "More info" which will then display a "Run anyway" option. If you decide to click this it will go through the installation process.
Acervus is a complete installation. Start menu item, choose to have a desktop icon, and it will display in your add/remove programs window for an easy uninstall.
If you have made it this far and decide you're going to go all the way, I want to say Thank You! for giving Acervus a try. It started with me tracking inventory with spreadsheets, to a semi-automated spreadsheet updater, to a "I could make this pretty and share it" program. Then all the extra stuff came along! I sincerely hope you enjoy using it.
-Aubven.
BEST START
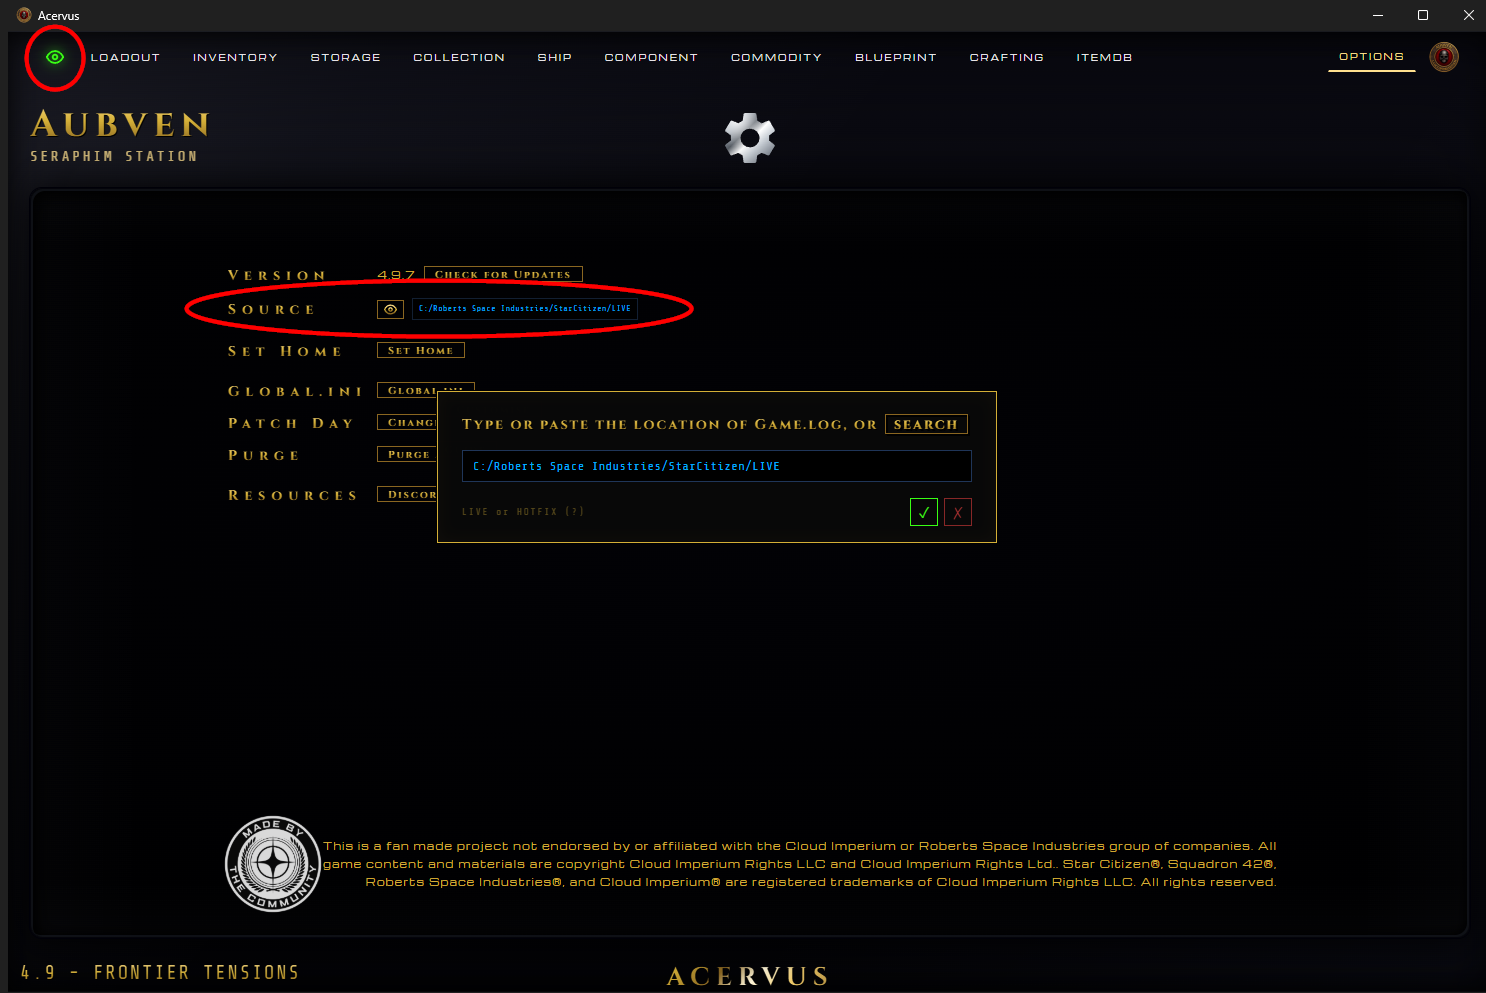
Start Acervus prior to launch or while you are in the lobby before entering the PU. Click the eye in the top left corner and set the SOURCE. Acervus only accepts LIVE or HOTFIX folders in your Star Citizen directory. PTU is not supported.
This ensures Acervus detects your character when you enter the game and enable the use of tools like Set Home, a function integral for Acervus to assign Scrip and ASD rewards to your home location.
If Acervus is set up and running before you enter the PU it will prefill the Loadout with all your equipped items, saving you from having to get them all recognised manually. Every session starts with your Loadout data being refreshed and up to date.
If you start monitoring after you have joined the PU server (you are in game and able to move your character), simply open mobiglass, inventory or local/ship/container storage. This will load your information in Acervus and kick start the monitoring.
NOTE - using the mobiglass or opening inventory while you are not in a location with storage can only start the monitoring process if Acervus has previously recorded your character.
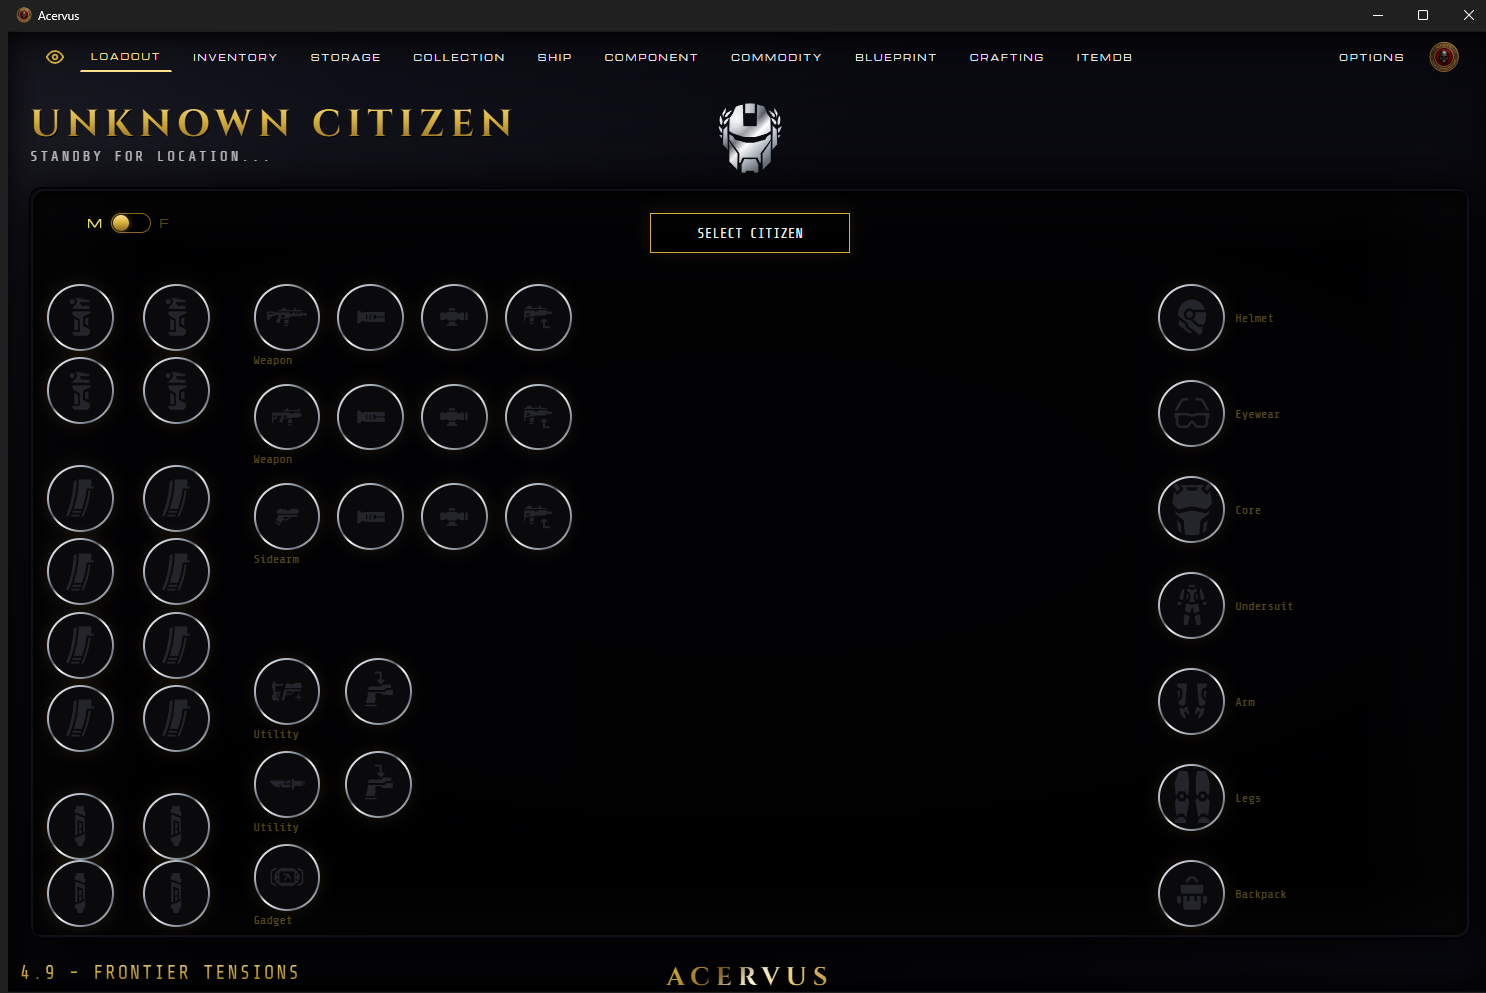
UNKNOWN CITIZEN - This field will auto populate with your characters name.
STANDBY FOR LOCATION - This field will auto populate with your location. Please note at this time only locations that have a local inventory are tracked. Acervus is an inventory manager, not an exploration module.
Important Operation Information
IMPORTANT INFO
Acervus doesn't know what you already have. It can't "see" into your inventory, or what your character is wearing.
Acervus tracks items like a Jurassic Park T-Rex, by movement.
It will only know you have an item, or have removed an item, through the movement of said item. Movement refers to yourself manually taking something and adding/removing it to storage, equip/unequip, buying/selling with a shop, or being rewarded scrip, blueprints, Wikelo items, etc.
WHAT DOES THIS MEAN FOR ME?
There is only one way to get Acervus up to speed, and as we get further from the last wipe the more time this can take (depending on your hoarding habits.) The easiest method of getting Acervus up to speed is investing in 8scu boxes and filling them up with what is in your inventory. There is no client side registration of items being moved when using Move All, it all needs to be moved one at a time (but shift+click works fine). A quick way is to Move All to SCU containers and then shift+click them back into inventory, Acervus will record them as they're moved back. You can also move them to the container (one by one) and Acervus will register the item being in a container and where that container is stored (see the section on Storage).
Open up local storage and a container, have both open (one on the left and one on the right side of your screen), and have at it.
A little bit of a chore. But once it's done Acervus will handle the majority of tracking from here on out.
FREIGHT ELEVATORS, CARGO & SIZE 2 & 3 COMPONENTS
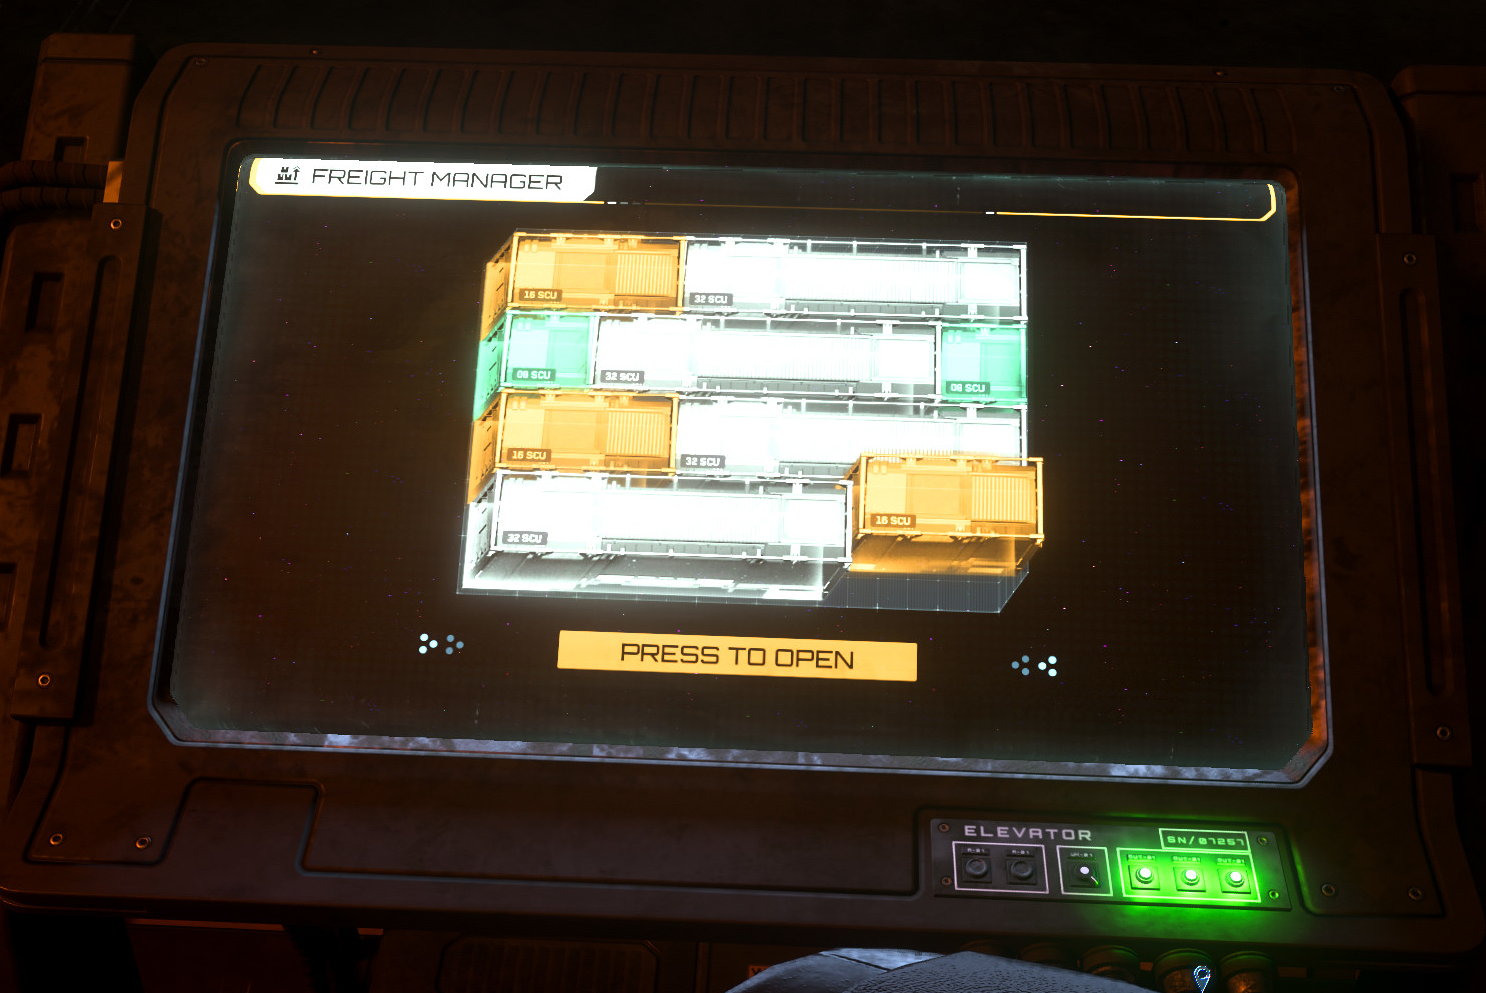
There is ZERO information provided that Acervus can use when utilising a freight elevator. Just doesn't exist. So size 2+ components, ship weapons, and commodities will always need to be added manually (bought and sold is still tracked). I've made this as painless as possible with the edit feature to easily add, remove, and change the location of components and commodities.
Size 1 components can be added to/removed from SCU crates and be tracked this way.
Contract Rewards
Acervus currently tracks some rewards received from completing contracts.
- Scrip
- Blueprints
- ASD Secure Drives
- Wikelo
- Event Rewards
Scrip and ASD Drives that are obtained on completion of a contract will be recorded in Inventory at your home location.
Blueprints are recorded in the Blueprint window, they are not a physical item and are viewable from a fabricator. The default blueprints that all players receive will be recorded immediately when Acervus detects your character for the first time.
Wikelo vehicle rewards are updated in the Ship page, while other items will be recorded at the current Wikelo base you are occupying. Acervus will also remove the reward requirements from Inventory if you have them recorded at the station where you are completing the contract.
RCMBNT variants can not be tracked by Acervus. The variant rewarded is not written to the game log. I have even tracked the missions in the log, as your choices dictate the reward received, and there is currently insufficient data to use. These rewards will need to be manually updated in the Commodity window.
Hangar.Link
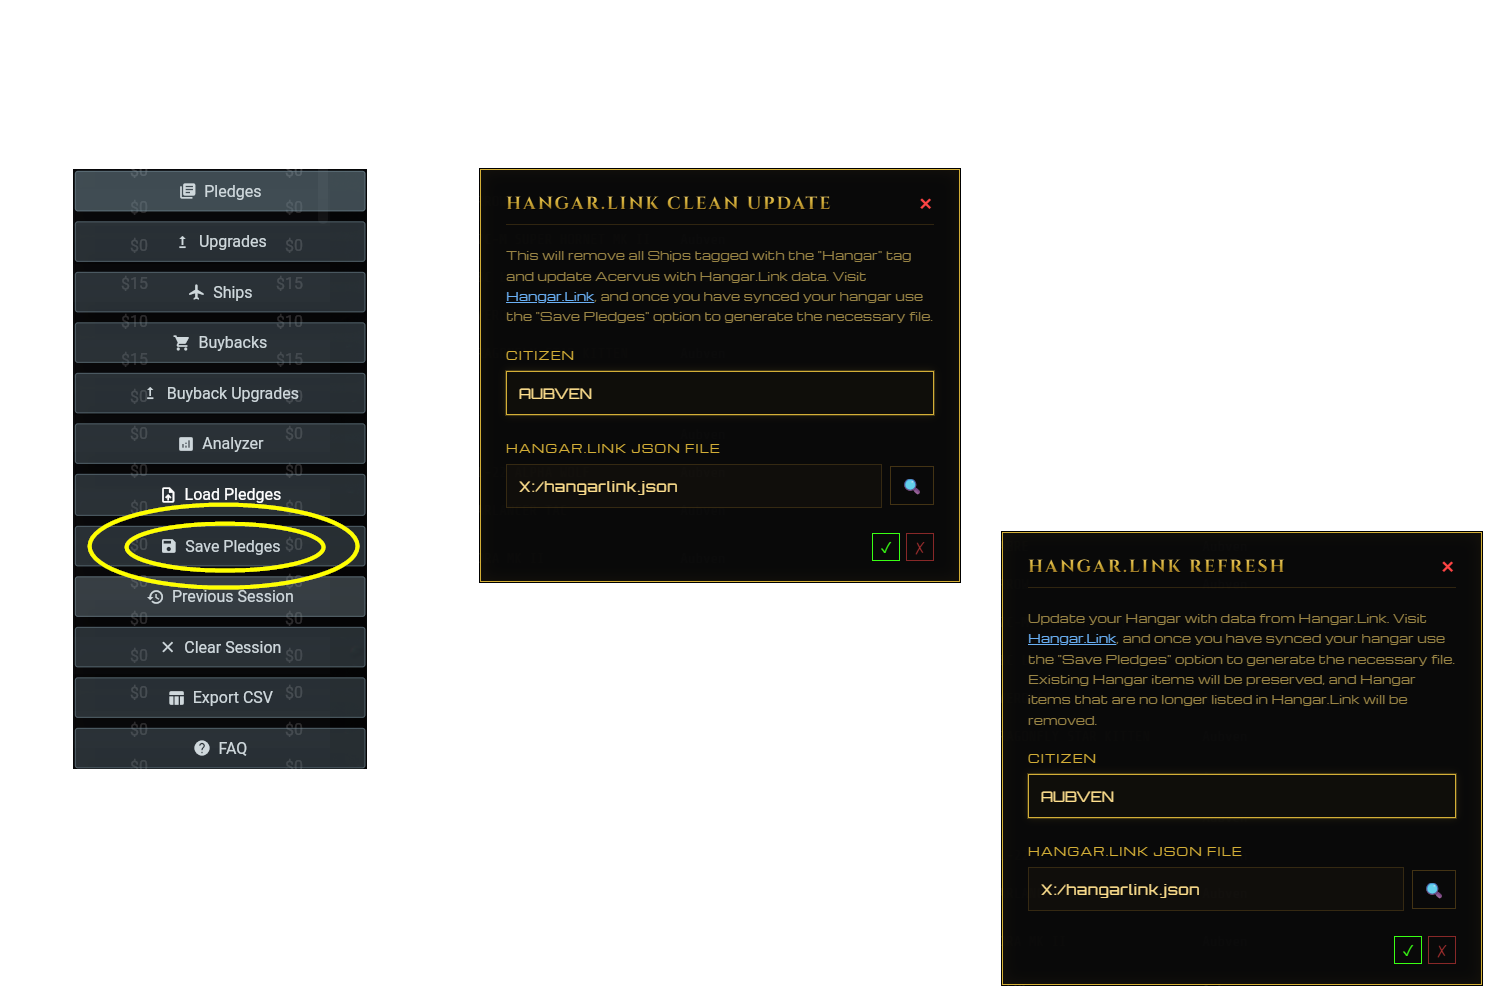
Acervus can utilise your Hangar.Link info to load in your ship and livery data. To start you will need to have your RSI data synced with Hangar.Link, and once done open the side pane to view available options. Acervus requires the .json file which is downloaded by selecting the Save Pledges option. This only needs to be done once, as both Ship and Component windows will use the same file.
Once the JSON is saved to your local system click the Hangar.Link option on the Ship or Component sidebar, select character, and locate your file or type/paste the filepath. Acervus will review the file and show you all the options it found for confirmation. If some ships are not correct simply untick the checkbox and either edit the name or remove the entry completely.
If you have ships marked as Hangar (gold ship icon) already listed in Acervus it is recommended to use the Update option. It will compare your Acervus hangar ships to your Hangar.Link list and update Acervus to match. This will also remove ships if you melted them to pledge something different.
Loadout
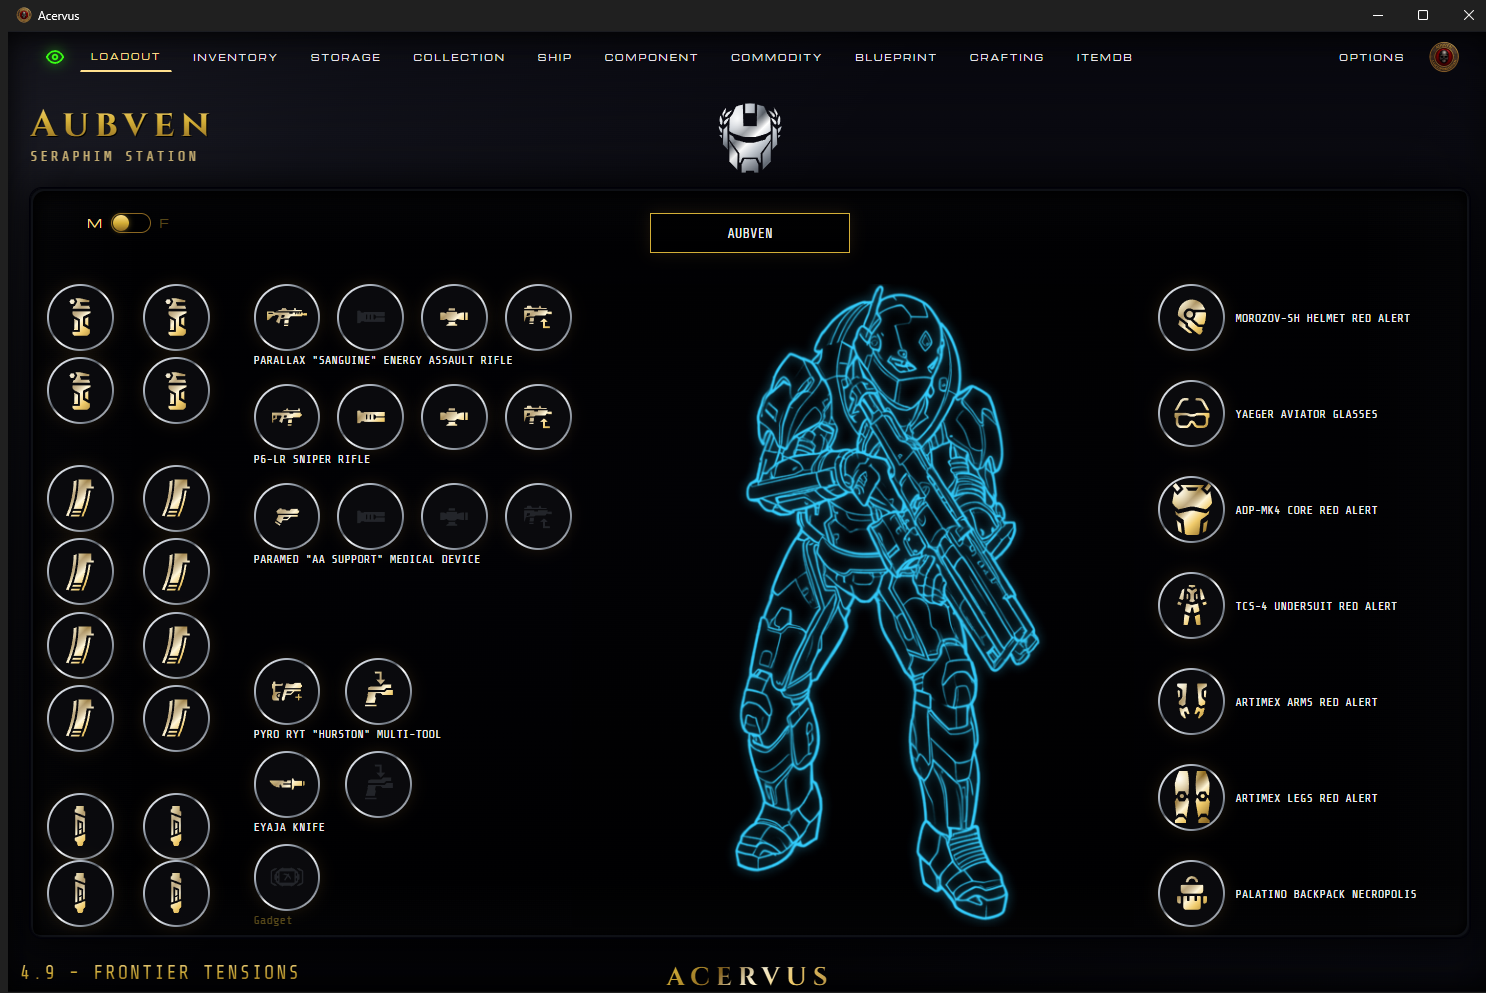
Loadout displays all items currently equipped to your characters. From the undersuit to the barrel attachment and everything in between.
Clicking the Citizen Loadout button will present a dropdown menu to change between characters that currently have equipped items. Hovering over each item in the Loadout screen will present information found in the in-game tooltip.
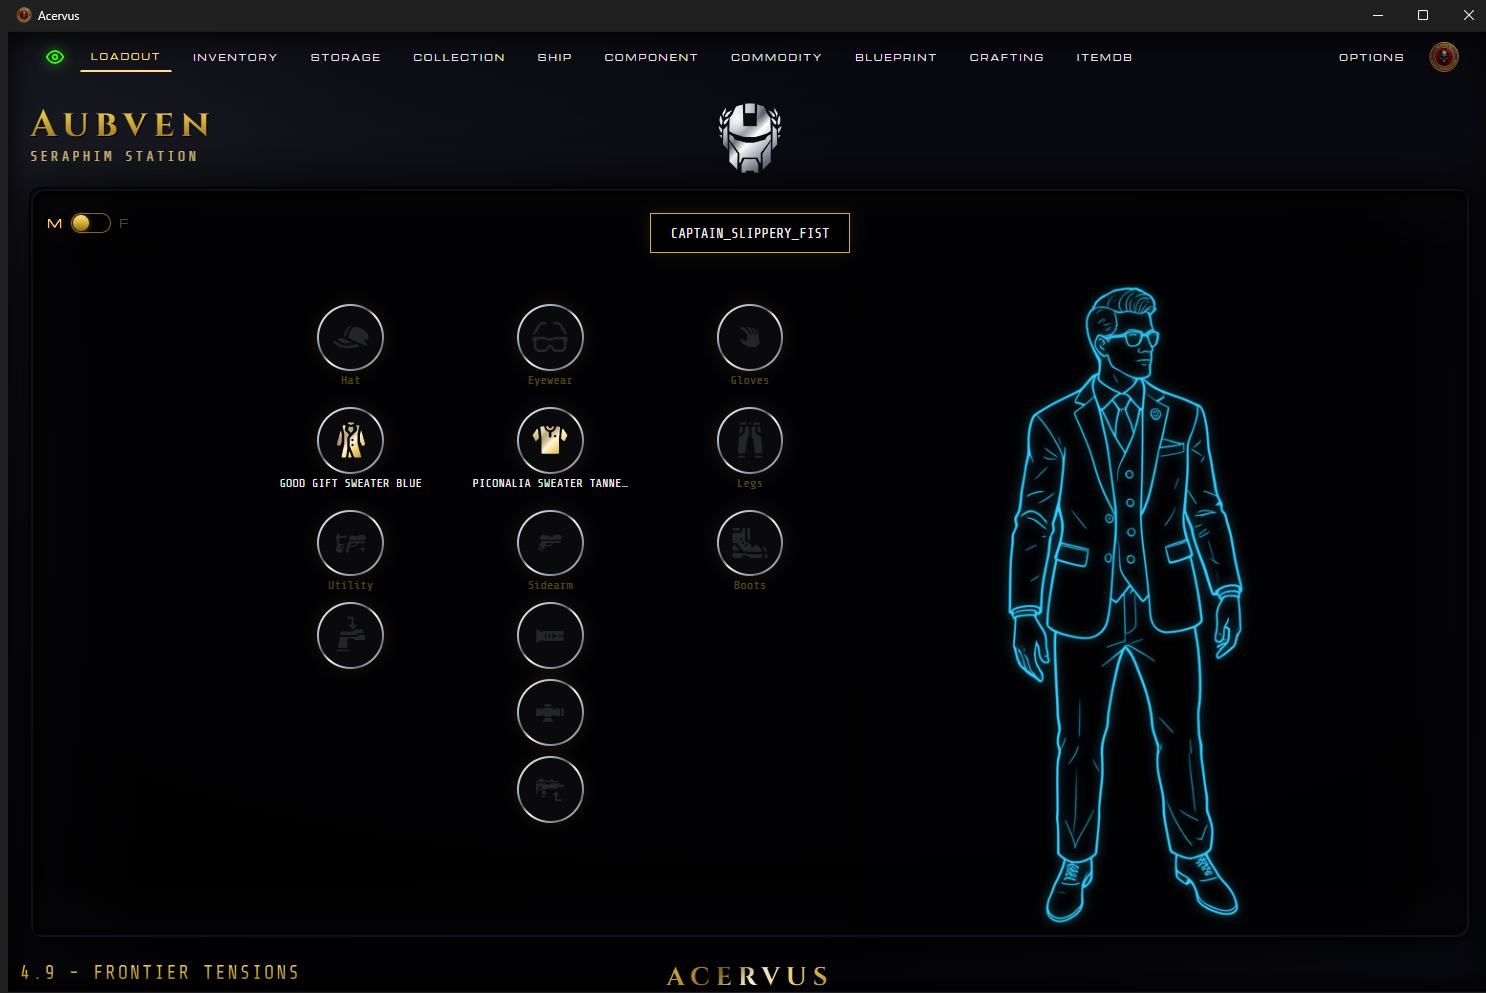
An image will be displayed of a character depending on items worn. There are Masculine/Feminine versions of each, which can be toggled with the M/F switch in the top left.
- Clothing
- Flightsuit
- Undersuit
- Environmental Suits
- Light Armour
- Medium Armour
- Heavy Armour
- Superheavy Armour
Items equipped to your character will also appear in Inventory denoted by a gold version of the Loadout helmet icon.
Inventory
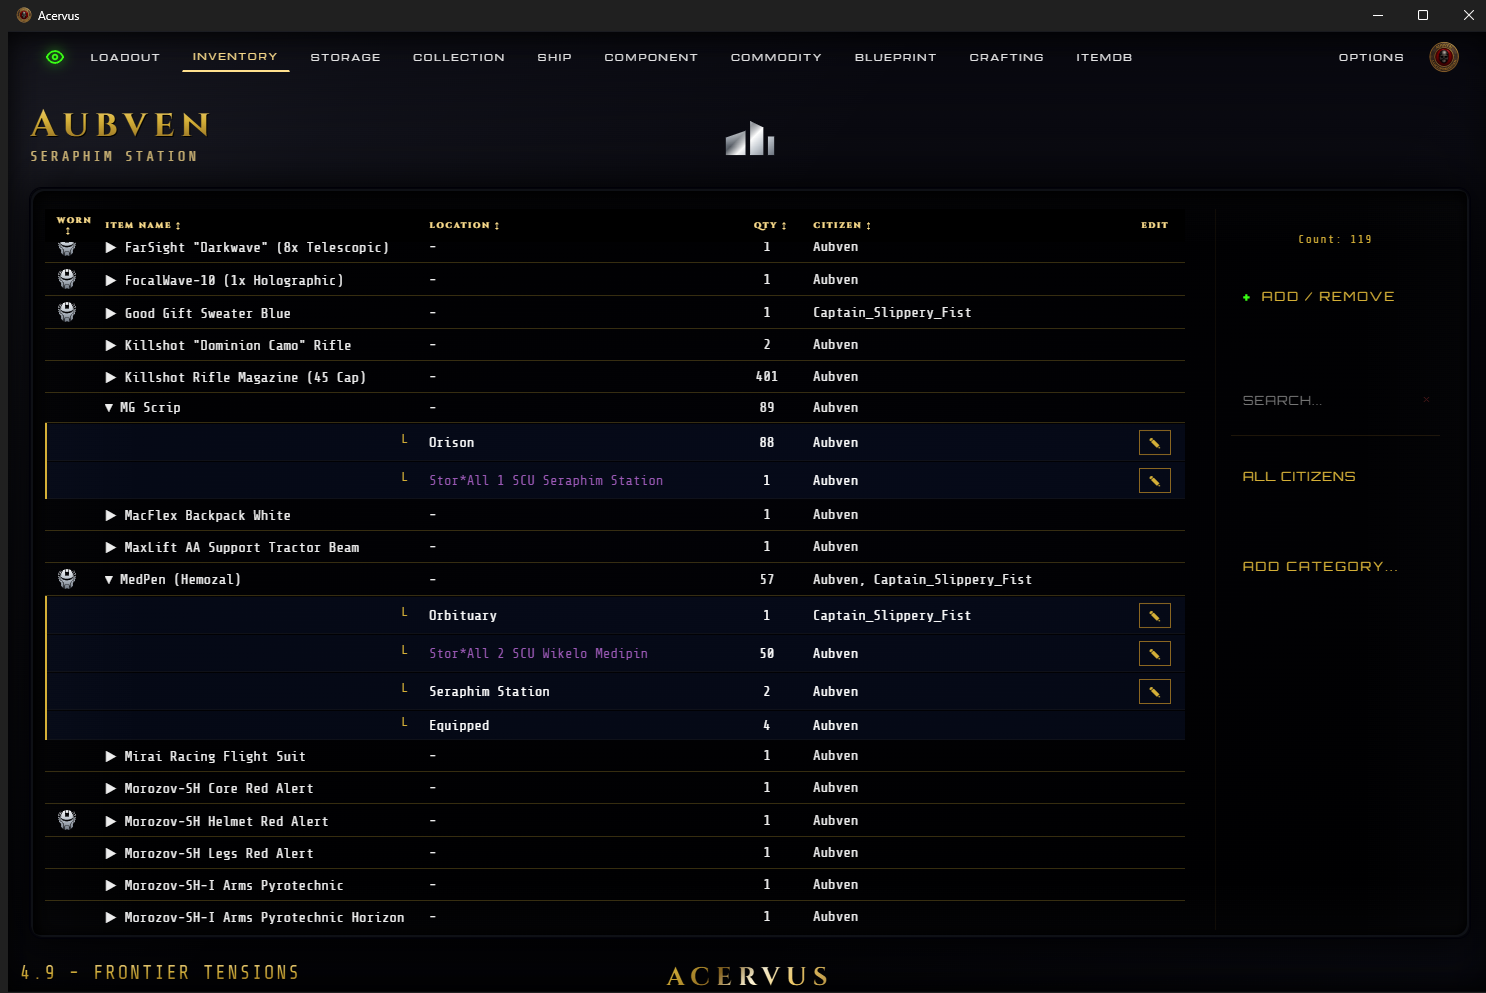
Inventory will track items as you place them in, and take them out of, local storage and containers or buy and sell from shop kiosks. It also automatically records your Scrip, ASD Drive, and Wikelo (non vehicle) rewards. RCMBNT rewards are considered cargo and are recorded in Commodity.
Clicking an item will present a drop down displaying the various locations it is stored, and items that are equipped to your character will display with a gold helmet icon to the left.
Items stored in SCU containers will show with a purple location text which advises the container size and location of the container. Clicking this will take you to the container in the Storage window.
ADD/REMOVE button, and the edit buttons in the table, allow you to easily adjust items. Add, remove, adjust item counts and change the items location.
SEARCH filters the list as you type and ALL CITIZENS drop down will filter by characters Acervus already knows. ADD CATEGORY has a wide range of filters in order to customise what is shown for easily tracking groups of item types. View specific armour types/weights, weapons, weapon damage types (e.g electron or ballistic), ASD and many more.
Storage
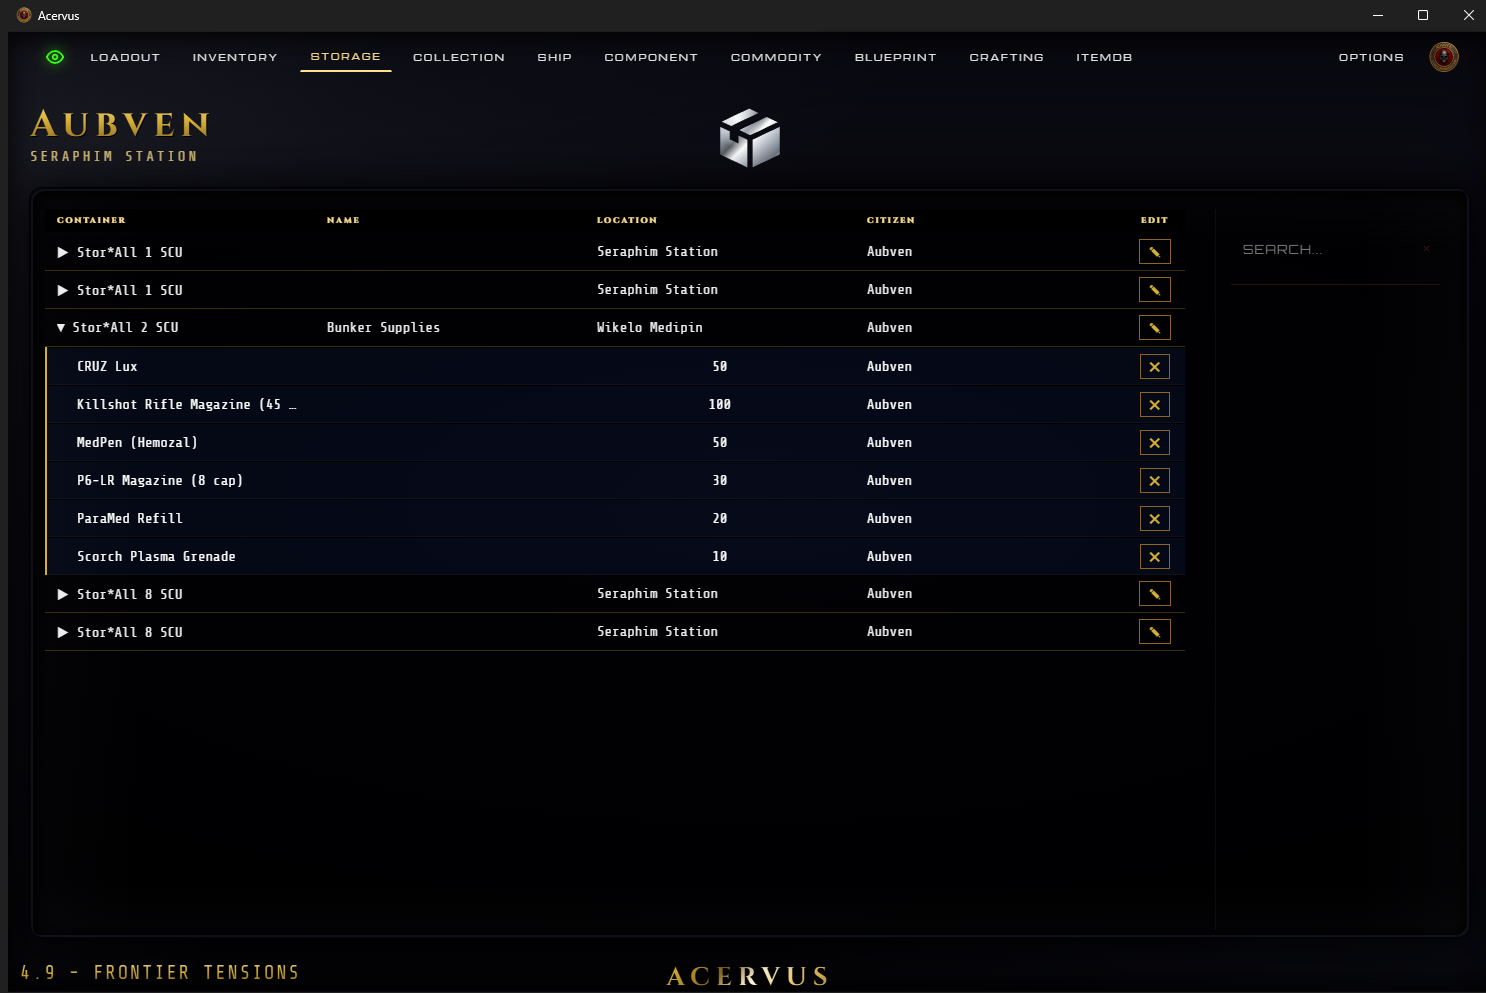
Storage is used to view SCU containers that currently have items stored within. The SCU containers themselves will be viewable as part of your Inventory, this section is simply to show a consolidated list of what is in each one. Empty containers will still be recorded in your data, but they will not display.
Clicking an item in Inventory which is stored in a container (purple text) will also bring you here with the container already expanded for viewing.
Individual items can be deleted from here, and the containers can be edited.
Editing allows deleting of the container (and everything in it), or changing the location. All locations that have local storage are available, custom location name, or selecting one of your own ships which you have recorded in Acervus.
TRANSIT location is used when a container is not in a location with local storage such as filling a crate with bunker loot out in the 'verse.
Freight Elevators and Moving Boxes
As mentioned in the Important Operation Information section of the guide, Acervus doesn't know when items come up and down freight elevators. This is due to limitations imposed by information provided by the game. If you have a container in local inventory and bring it up an elevator opening it will update the containers location in Acervus to TRANSIT. Sending a container down an elevator and opening it within the local storage will automatically update its location to the current location.
Collection
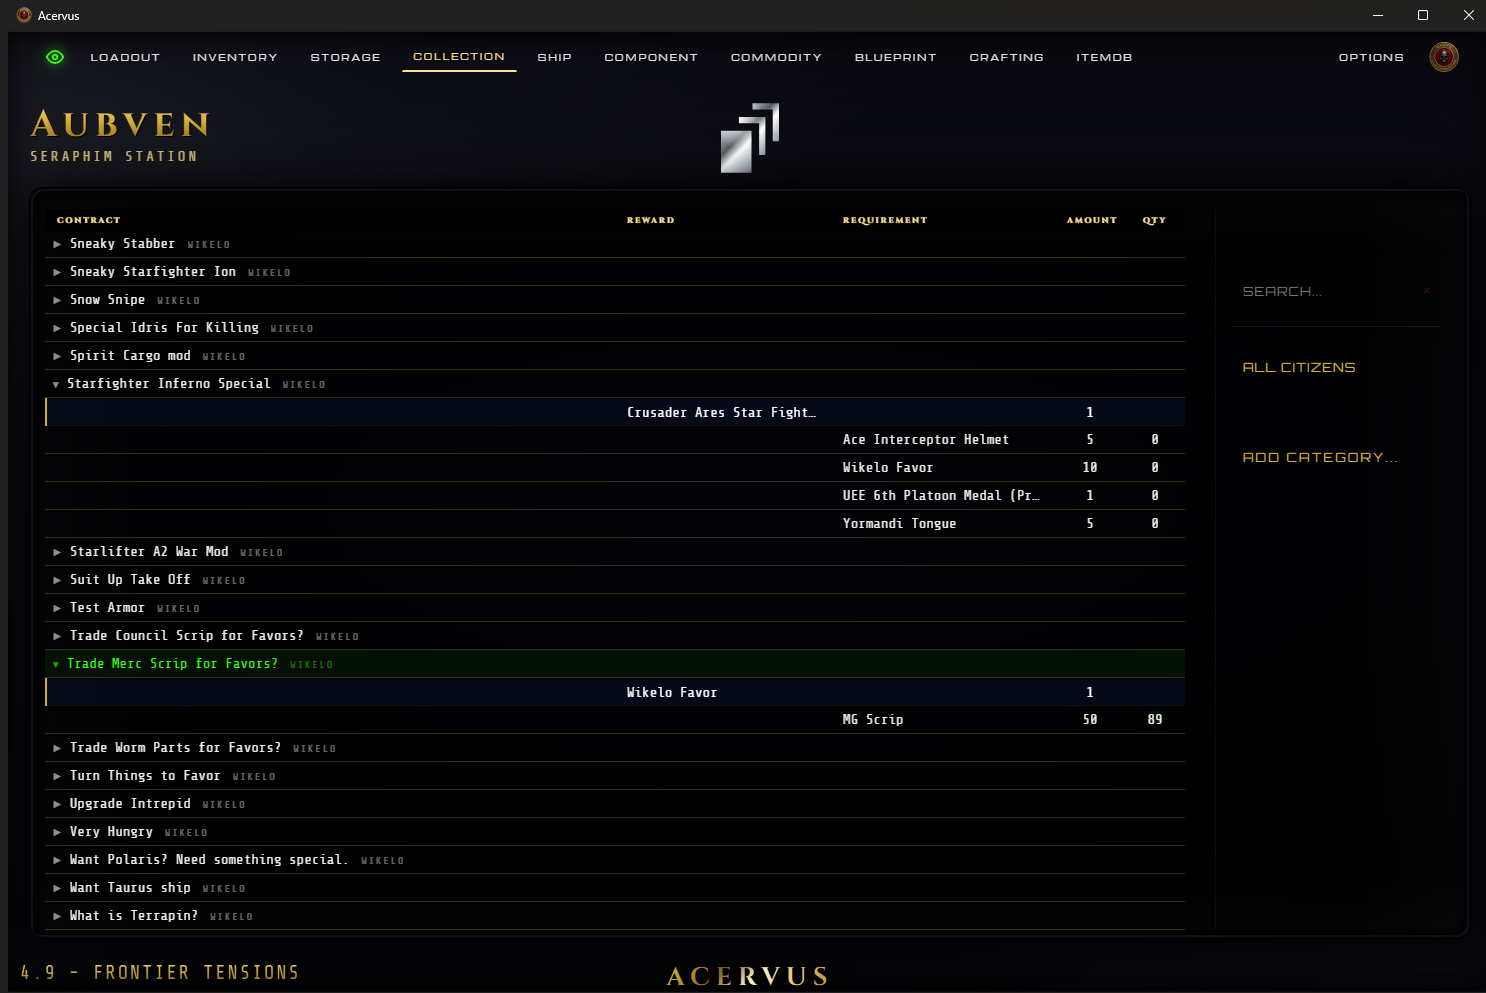
The Collection window is to assist with tracking progress for rewards that require players to collect items. Currently this window tracks Executive Hangar comp boards and all Wikelo contracts.
Clicking an item will present a dropdown that will show the rewards, including Wikelo reputation, and the item requirements.
Collection tracks your inventory in order to give you an up to date comparison of each requirement. Once the minimum amount of items is recorded in your Inventory the relevant collection will be highlighted in green to quickly see what is ready for completion.
Ship
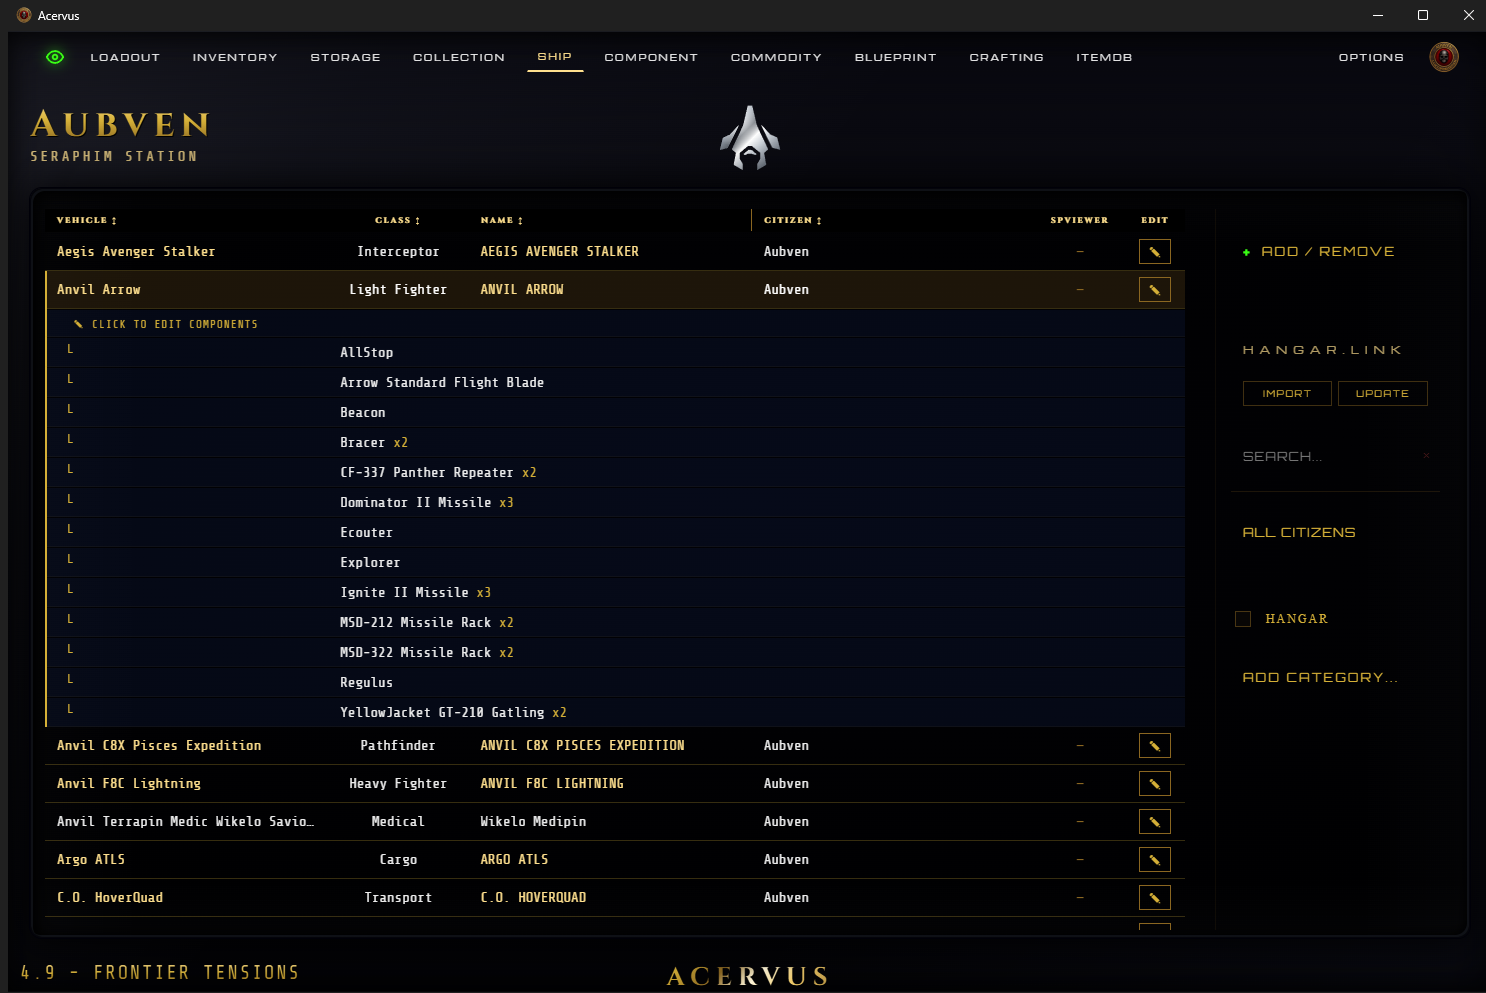
Vehicles in your RSI Hangar or purchased from in game shops will be added to the Ship menu, or you can manually add them. Here you can set a ship Name and add links for your builds you have saved on spviewer.eu.
erkul links are no longer available. I have not created an account after the changes implemented on their site and can no longer confirm the format of the links
The Hangar.Link buttons provide a way to import your pledged vehicles. Clicking Import or Update will provide instructions for how to extract the data from Hangar.Link.
ADD/REMOVE to manually add ships, with a Hangar option to add pledged ships. Pledged ships are denoted with a gold ship icon on the left.
SEARCH will filter as you type, and ALL CITIZENS allows filtering for ships owned by a specific character.
ADD CATEGORY allows filtering by Type, Career, Role, and Manufacturer.
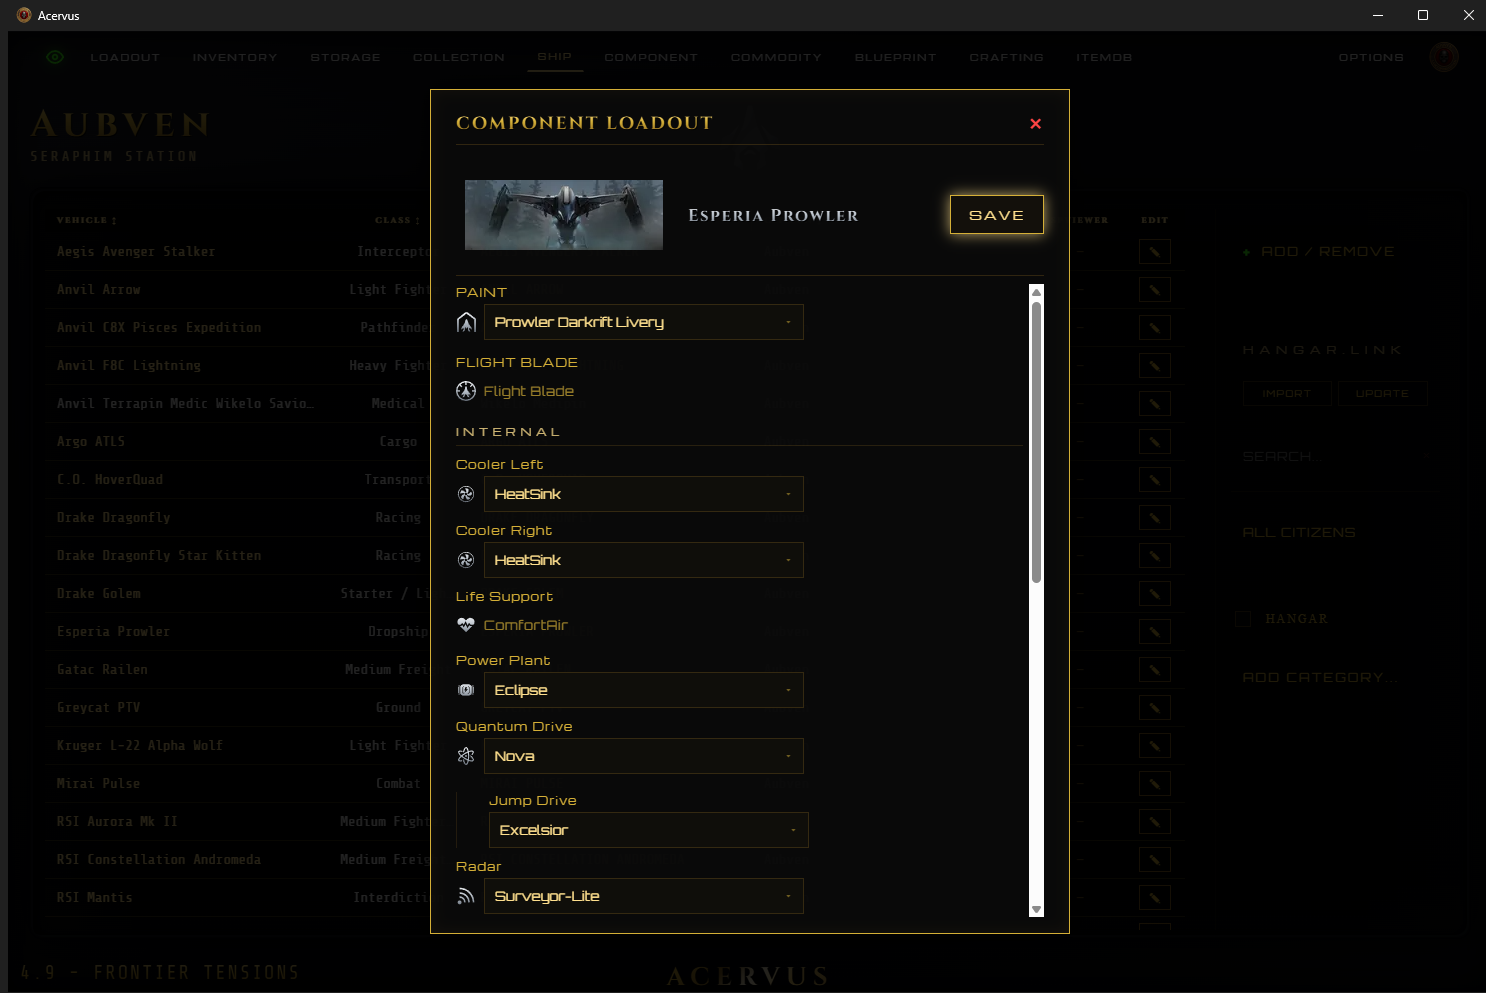
Components can be edited and are linked to the Component menu. Displayed in a dropdown under the ship, this allows you to track your ships and the components mounted to it. Clicking on Click to edit components below the ship name will open the Component Loadout window allowing you to edit your loadout.
All ships will have their components prepopulated with their default loadouts when added.
Red ship and cargo icons are present on the component dropdown menus indicating the component is owned and currently equipped to another ship or in storage. Hovering over these will provide information (ship name or location) of where they are currently located. Selecting a component with one of these icons will remove it from the ship/location and update the current ship. The previous component will be removed and placed into storage for your current location, or if editing while not in game it will default to your set Home location.
Components that lack an icon will add a completely new component directly to the ship. This will equip and record the new component in the Component window, removing any previous components and placing them in storage.
Component
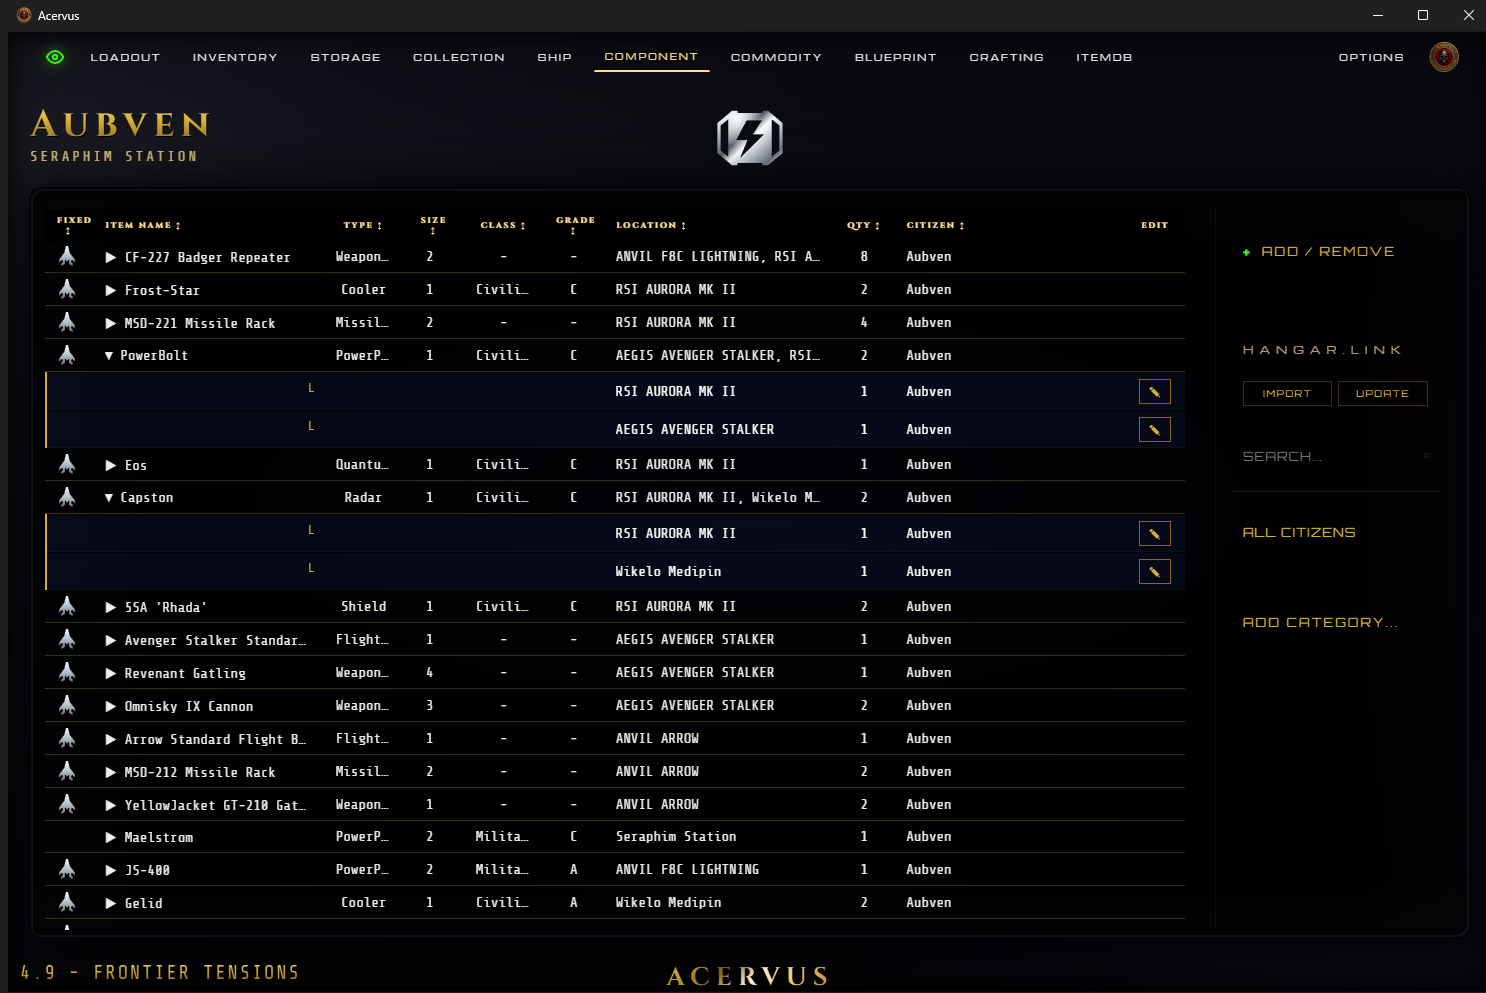
The Component menu gives an overview of all ship components. This includes internals (cooler, quantum drives, etc) and external components like weapons and ship paints. Components bought from an in game shop will also register here automatically.
From this screen components can also be added to your ships. Components installed on a ship are denoted by a gold component icon.
Hangar.Link allows for quickly updating Acervus with all vehicle liveries in your RSI Hangar.
ADD/REMOVE to add/remove from locations or ships. SEARCH filters as you type, ALL CITIZENS dropdown filters by known characters. ADD CATEGORY filters by a wide range of options. Grade, Type, Manufacturer, Size, Damage Type and more.
Commodity
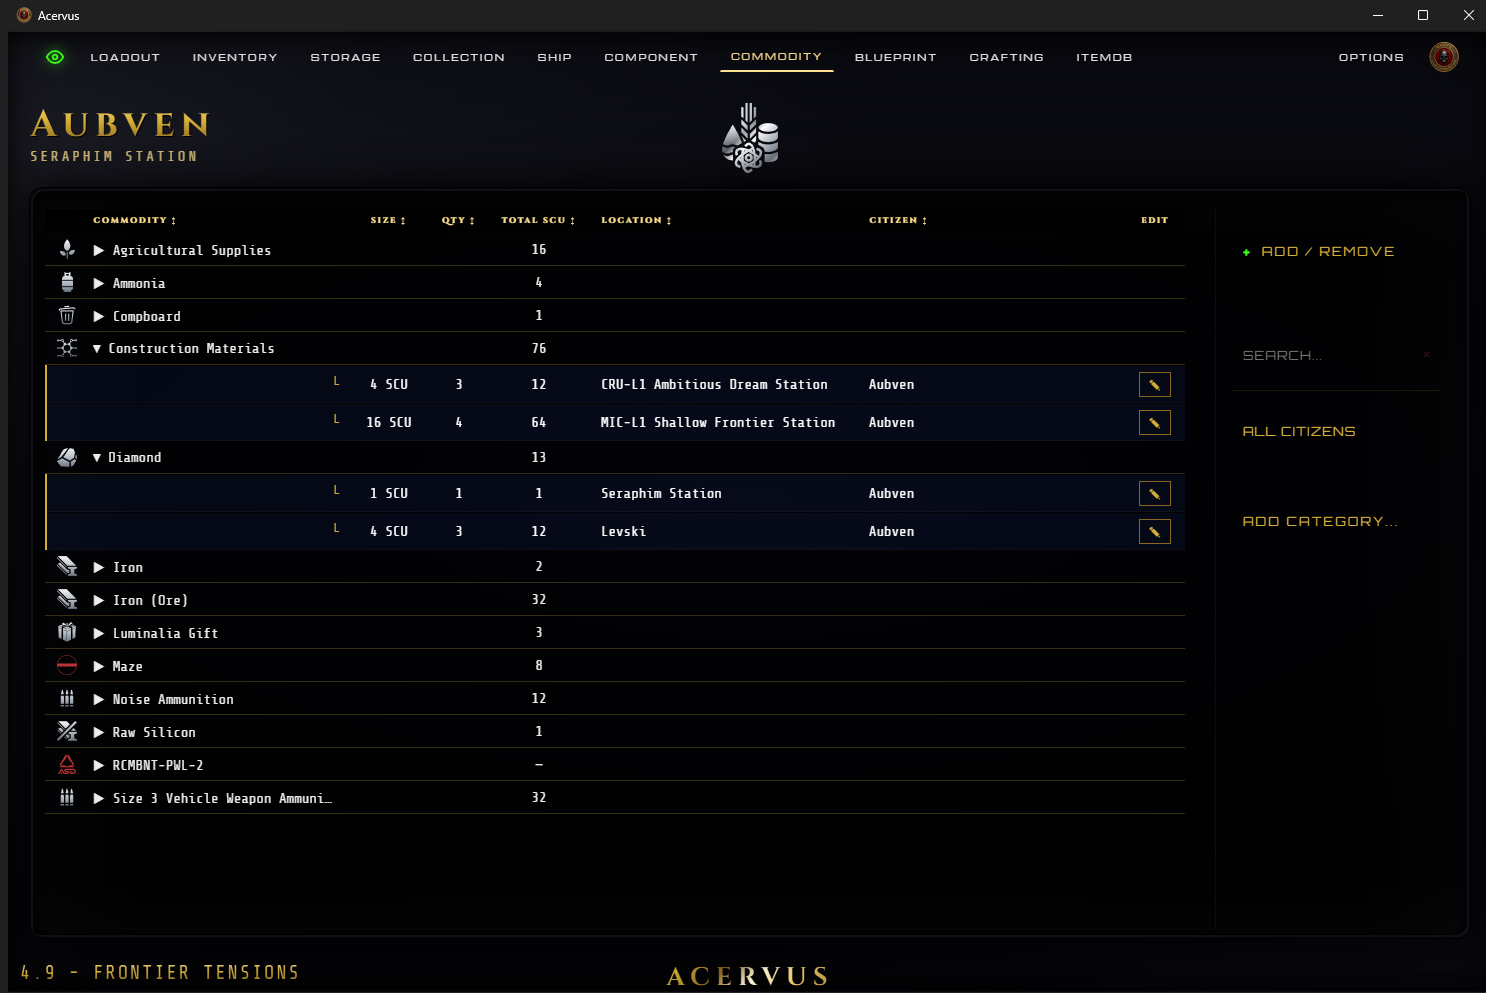
Commodity menu is where all of your store bought/sold commodities, including RCMBNT, are managed.
Each commodity is grouped together for a total SCU count, clicking on the item will reveal a dropdown that breaks down the commodity by container size, location and citizen.
ADD/REMOVE to store more commodities by adding the name, scu crate size, count and location. SEARCH filters as you type, ALL CITIZENS drop down filters by known characters and ADD CATEGORY allows you to filter through scu sizes, commodity types (metal, gas, etc), and more.
Blueprint
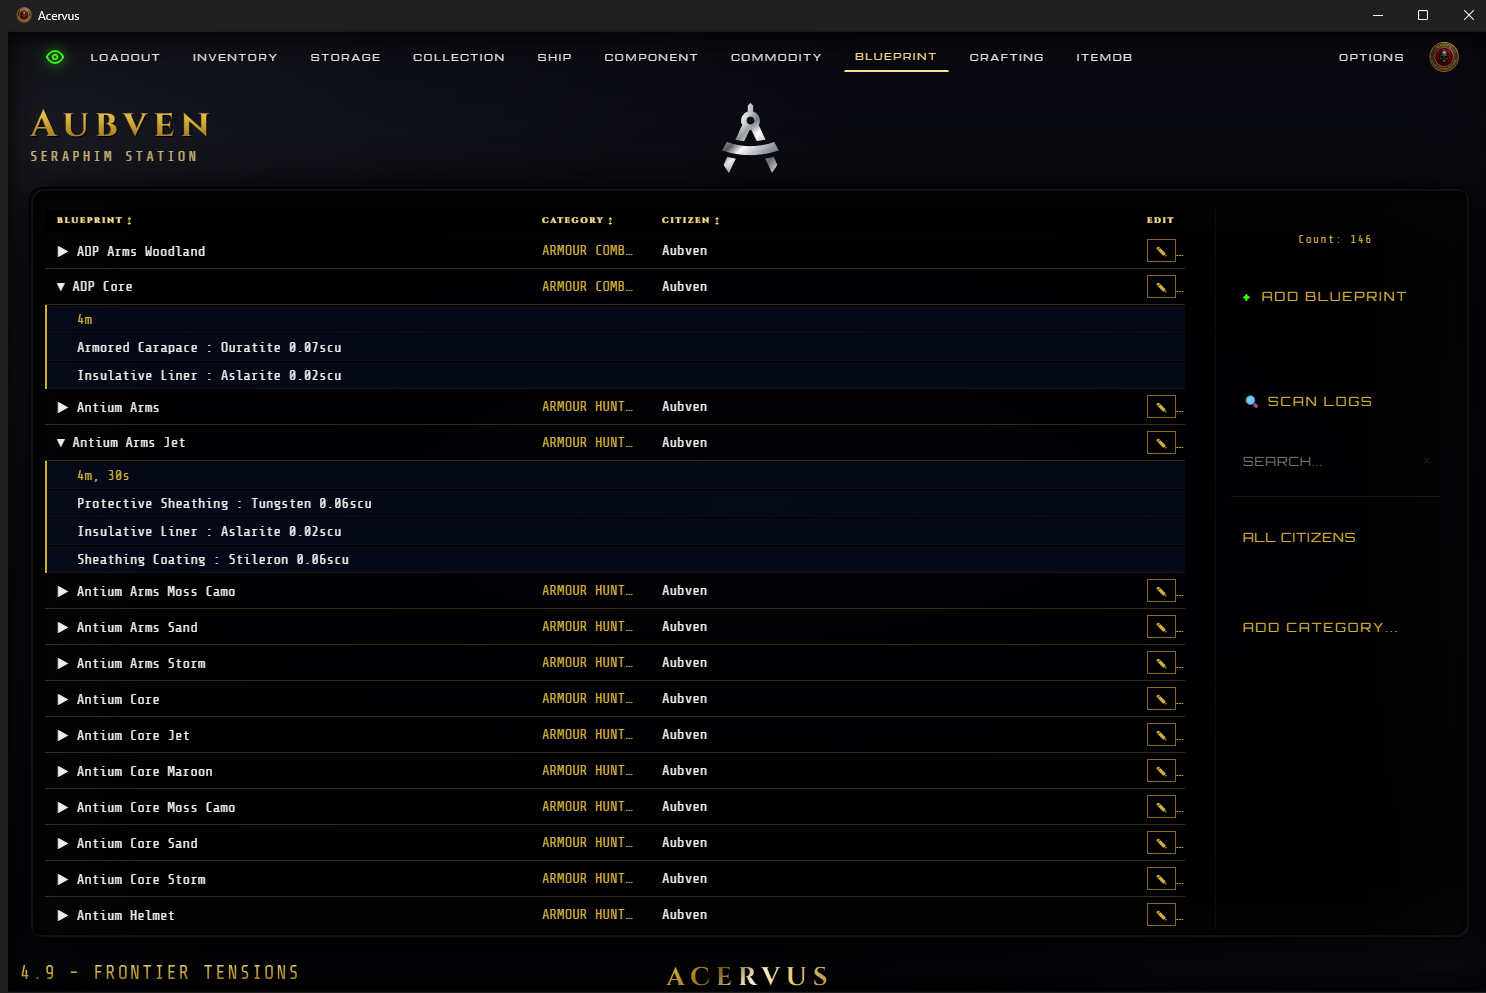
Blueprint menu lists all collected blueprints and Acervus auto loads the default blueprints everyone receives upon detection of your characters. Clicking a blueprint will give a dropdown displaying time to craft and material requirements.
SCAN LOGS will search your archived logs to pick up any you have already received as a reward. Acervus will never scan a PTU log file, ensuring only your LIVE/HOTFIX blueprints are recorded.
NOTE: Scanning works on archived log files. A fresh install will likely have no archives to search and require manually adding each one. This would need to be done by referencing your fabricator.
IMPORTANT
Acervus is set up to detect and record blueprints that are rewarded from contracts and automatically record them for you. But it should be noted that while steps have been taken to ensure customised global.ini files are accommodated there is always a chance if you are using one that the blueprints will not be recognised by Acervus. It is unlikely unless the modifications are very outlandish, but there is still a chance.
Crafting
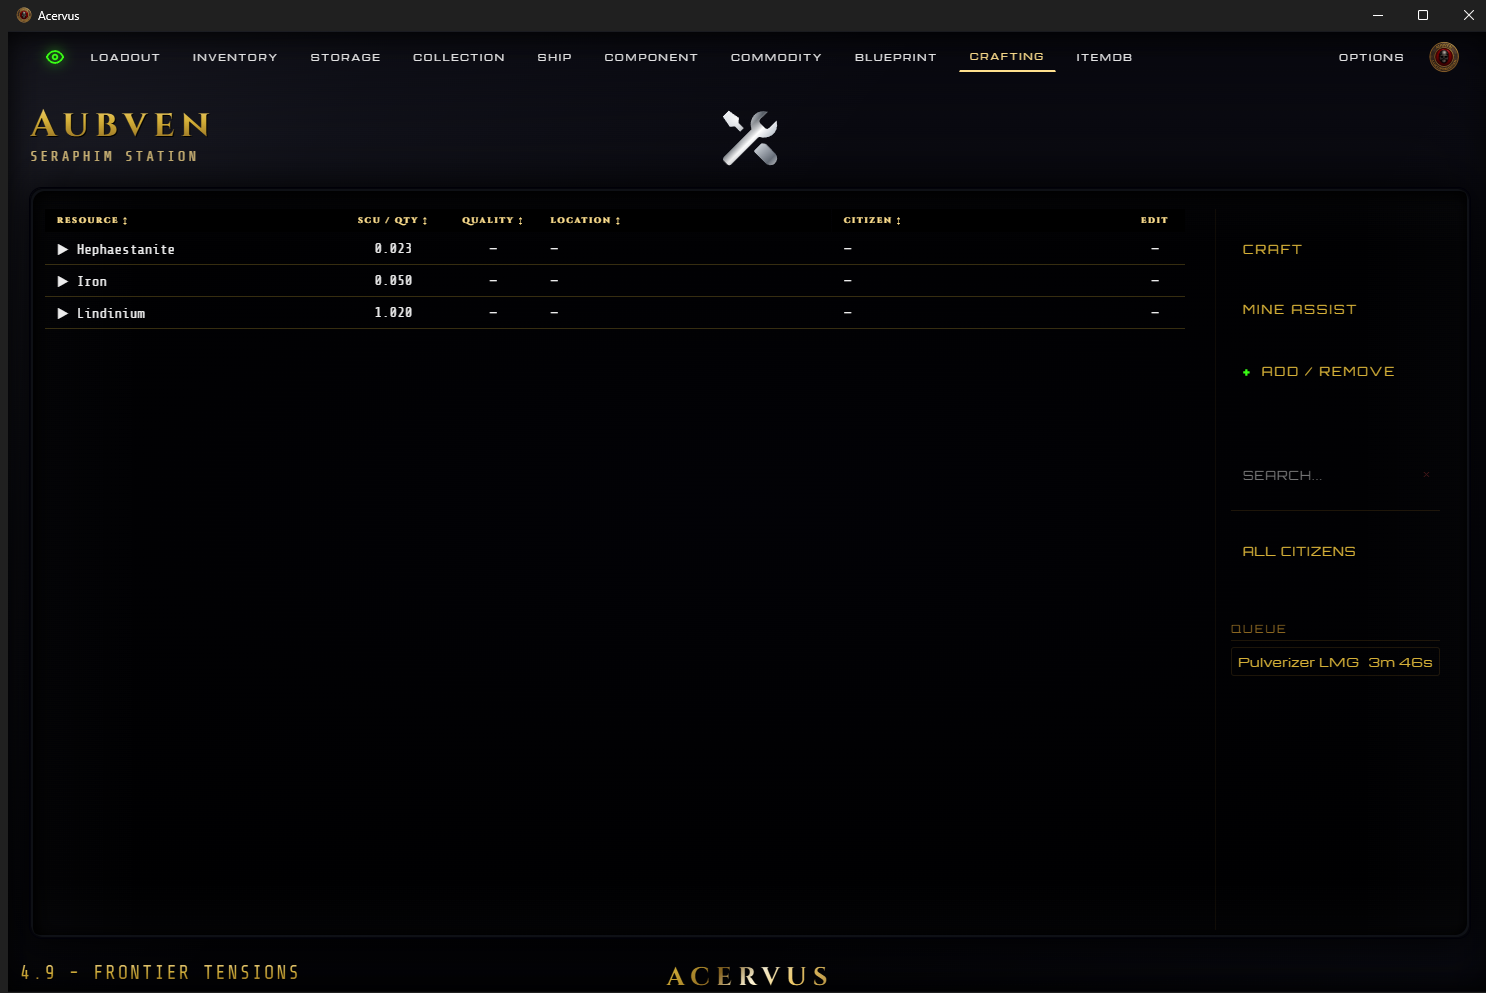
Crafting is where you record all resources that have a Quality attribute used for crafting blueprints. Entering the resources is manual, as there is no quality information in the log for Acervus to automate this.
The Crafting menu will only allow adding of materials that have a Quality attribute.
Quality is set through a dropdown menu, matching the specific qualities available for the selected item.
The Craft button will open a window to select a character and their blueprints currently recorded in Acervus. The amount to craft and the output location will also be displayed as options. Upon selecting a blueprint the adjusted stats will be displayed based on the available materials you have selected.
Once crafting is confirmed Acervus will automatically adjust the amount of resources you have stored. The item is added to the Queue with its own built in timer, and if you selected a Local Inventory location the items will automatically be added to your inventory/component lists upon completion.
Crafting - Mine Assist
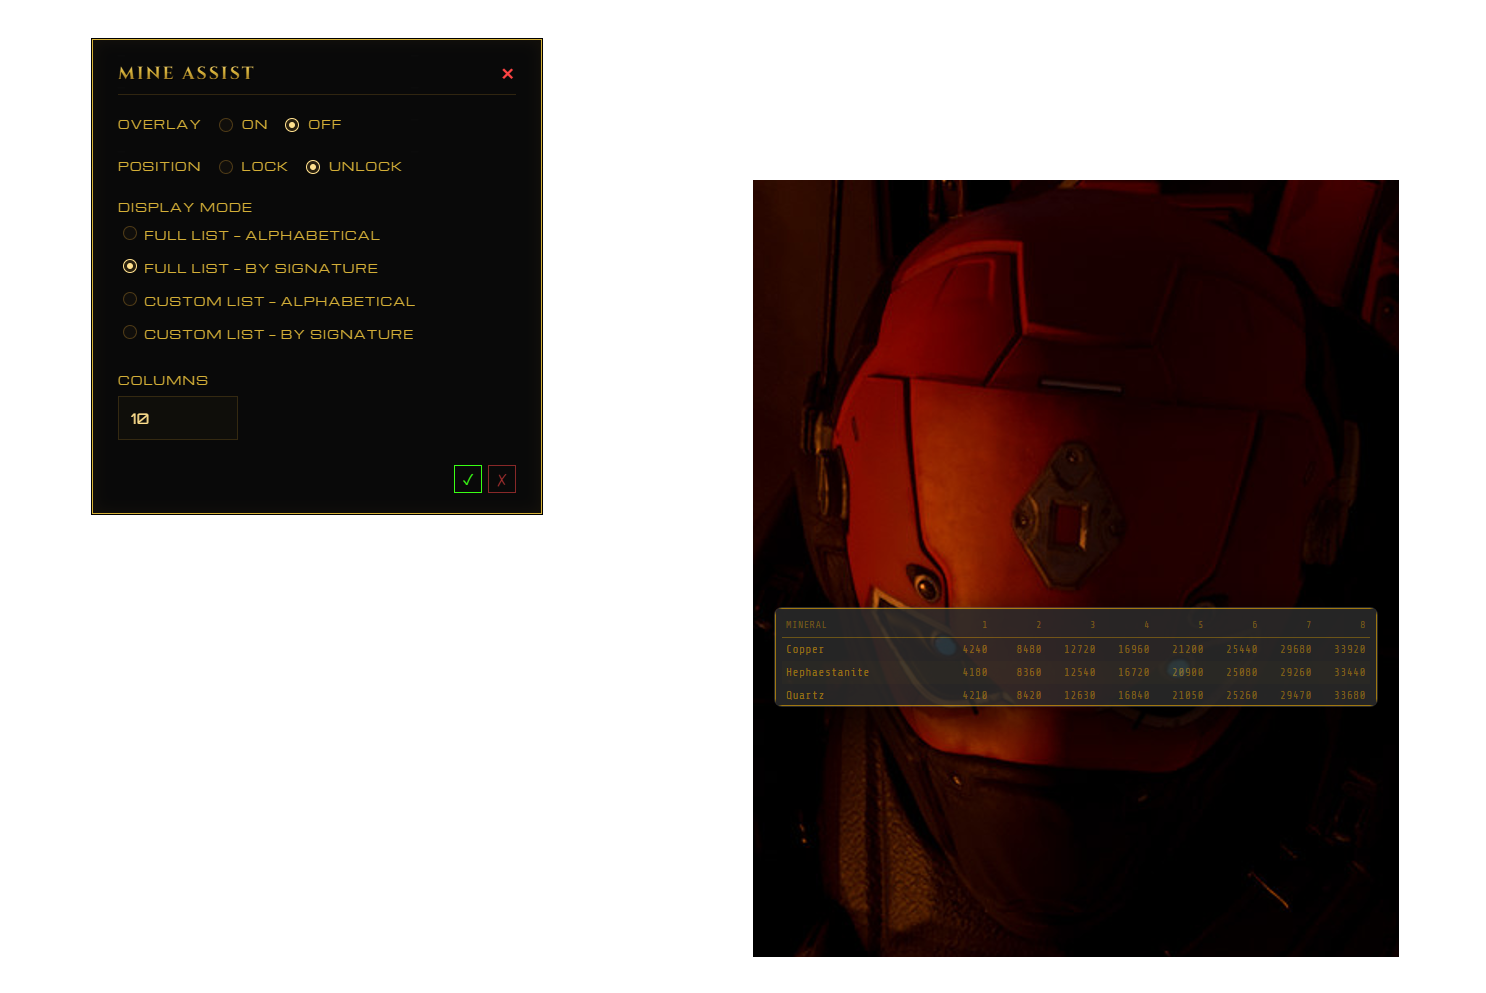
The Mine Assist function displays a semi-transparent chart for minerals and their signatures. This chart can list all minerals that are currently minable, or a user customised selection. The available signatures to display range from x1 to x20.
Once turned on it can be moved anywhere on your monitor(s). When locked it stays in place while becoming a click-through overlay allowing users to interact with anything on the screen behind it. Unlock in the Mine Assist options if it needs to be moved again.
itemDB
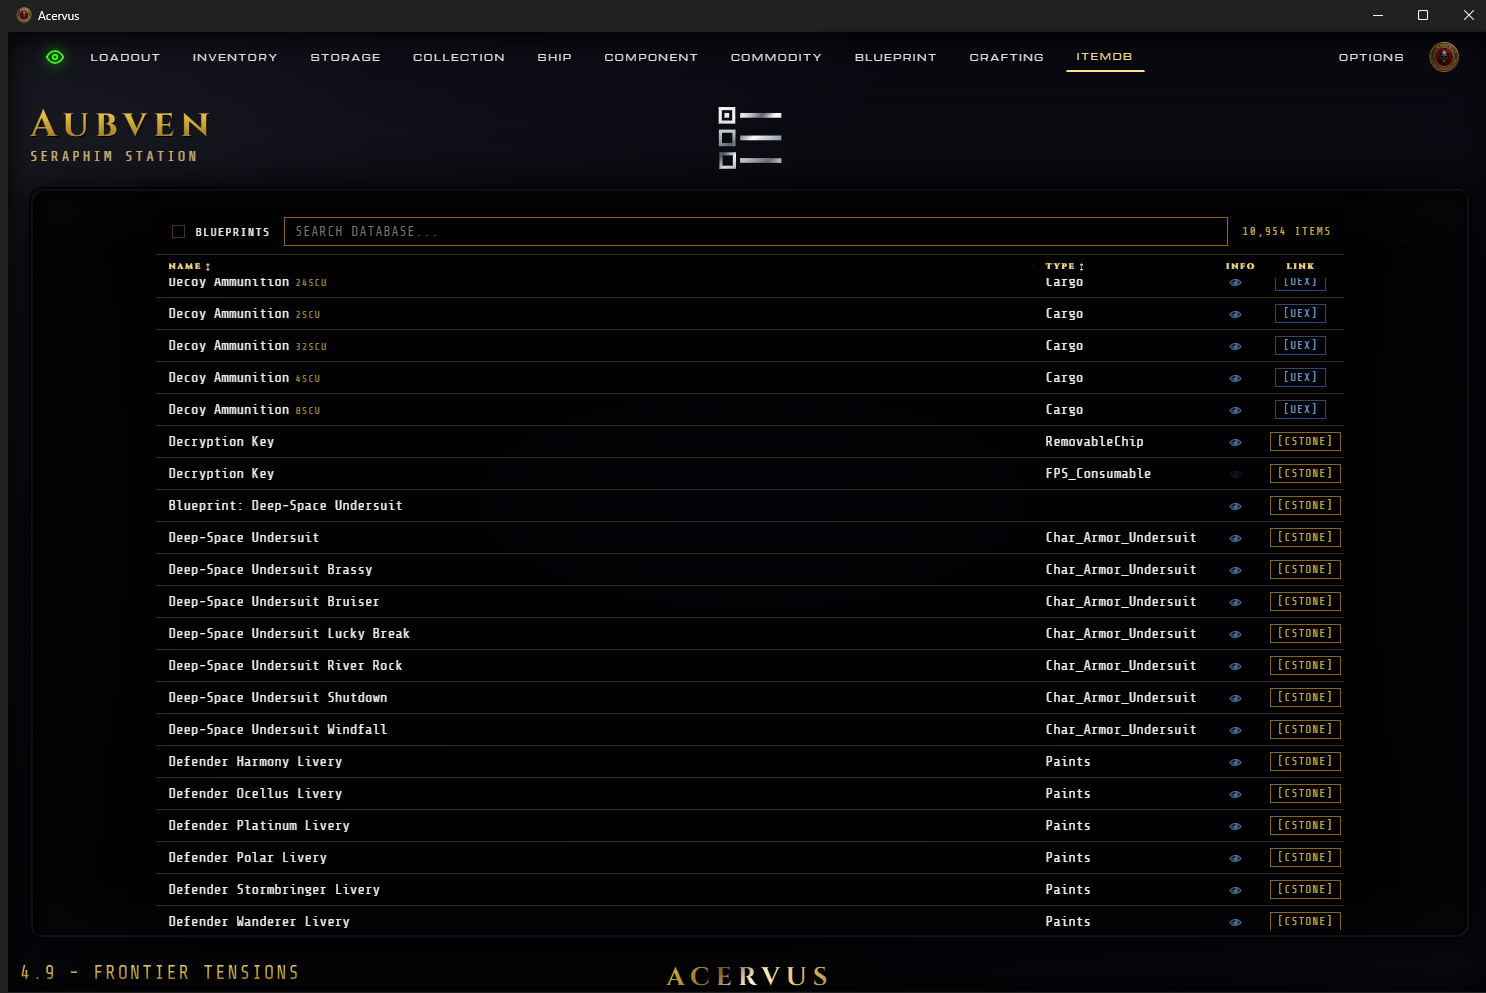
itemDB is the general repository of items in Star Citizen that are recorded in Acervus' database. Search for anything you like and use the links to visit CStone to find out more info or where to buy it, or UEX to get the latest trading info for specific commodities.
Most items have an eye icon that can be clicked to view the description information that is displayed in-game.
Options
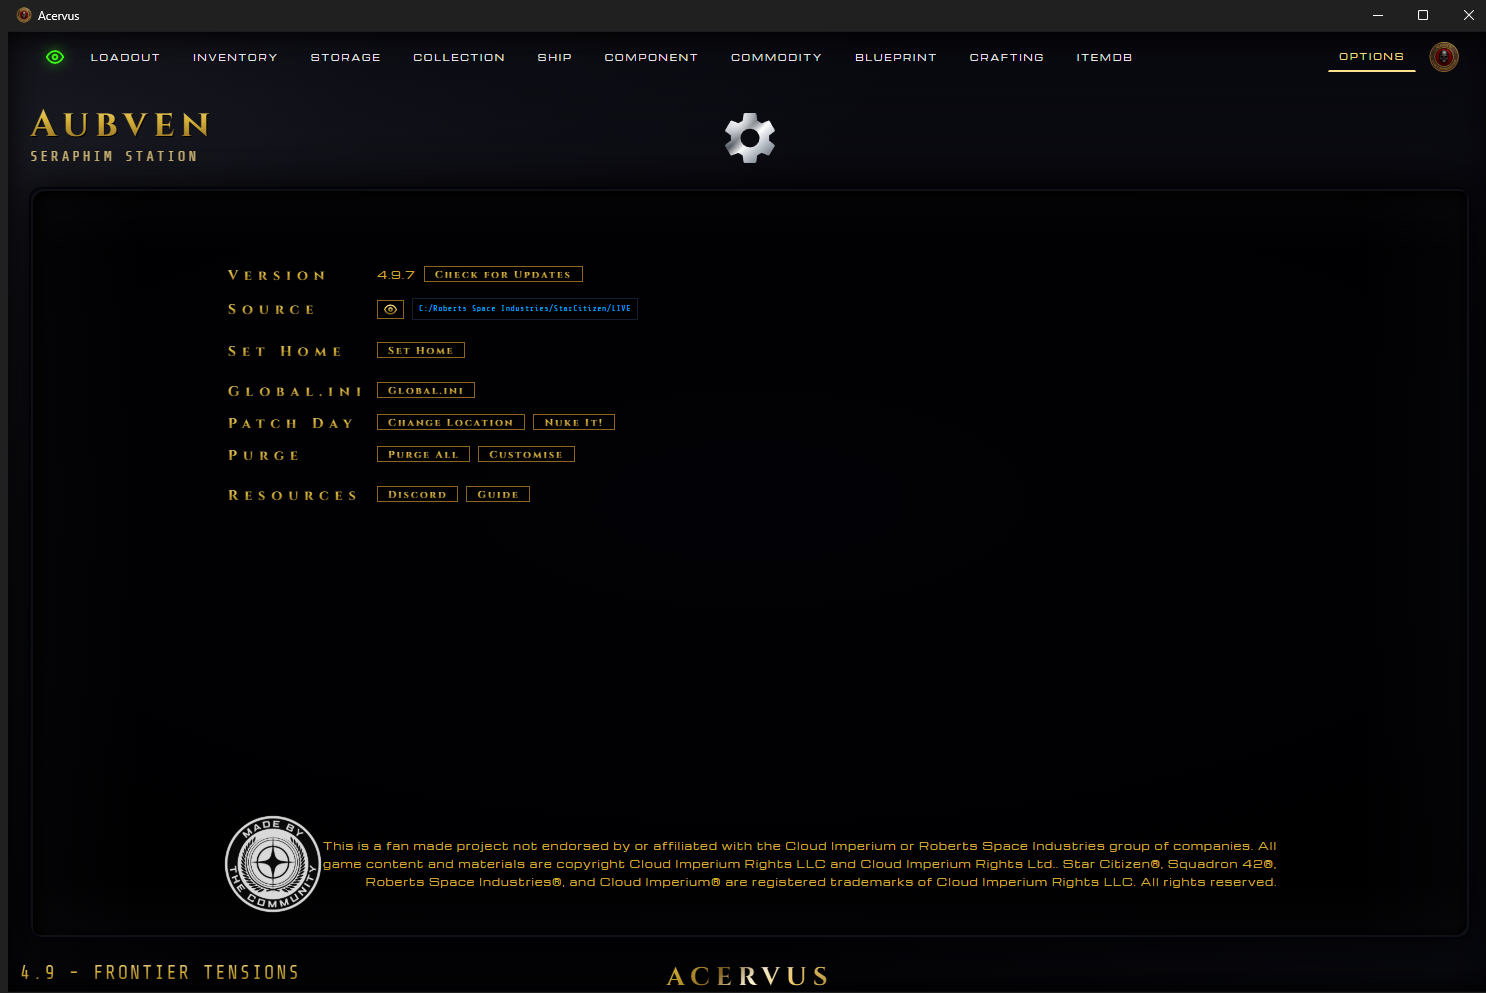
SOURCE: Select the folder location of your Star Citizen install. This is a prerequisite for Monitor to work. You can also click the 'eye' icon in the top left of the Acervus window.
SET HOME: Set your characters home location. This is required for certain rewards to be correctly recorded at your Home when received, and is also used in the Patch Day settings. Upon detection of a character there will be a warning window popup. It will not prevent you from interacting with your screen but it won't go away until you come into options and Set Home.
With a Home set, when a character is detected Acervus will display an icon next to the Set Home button relevant to that character's Home. Stanton options have their corporate logos, Rough & Ready for Orbituary and Checkmate, XenoThreat for Ruin, and The People's Alliance for Nyx starting locations.
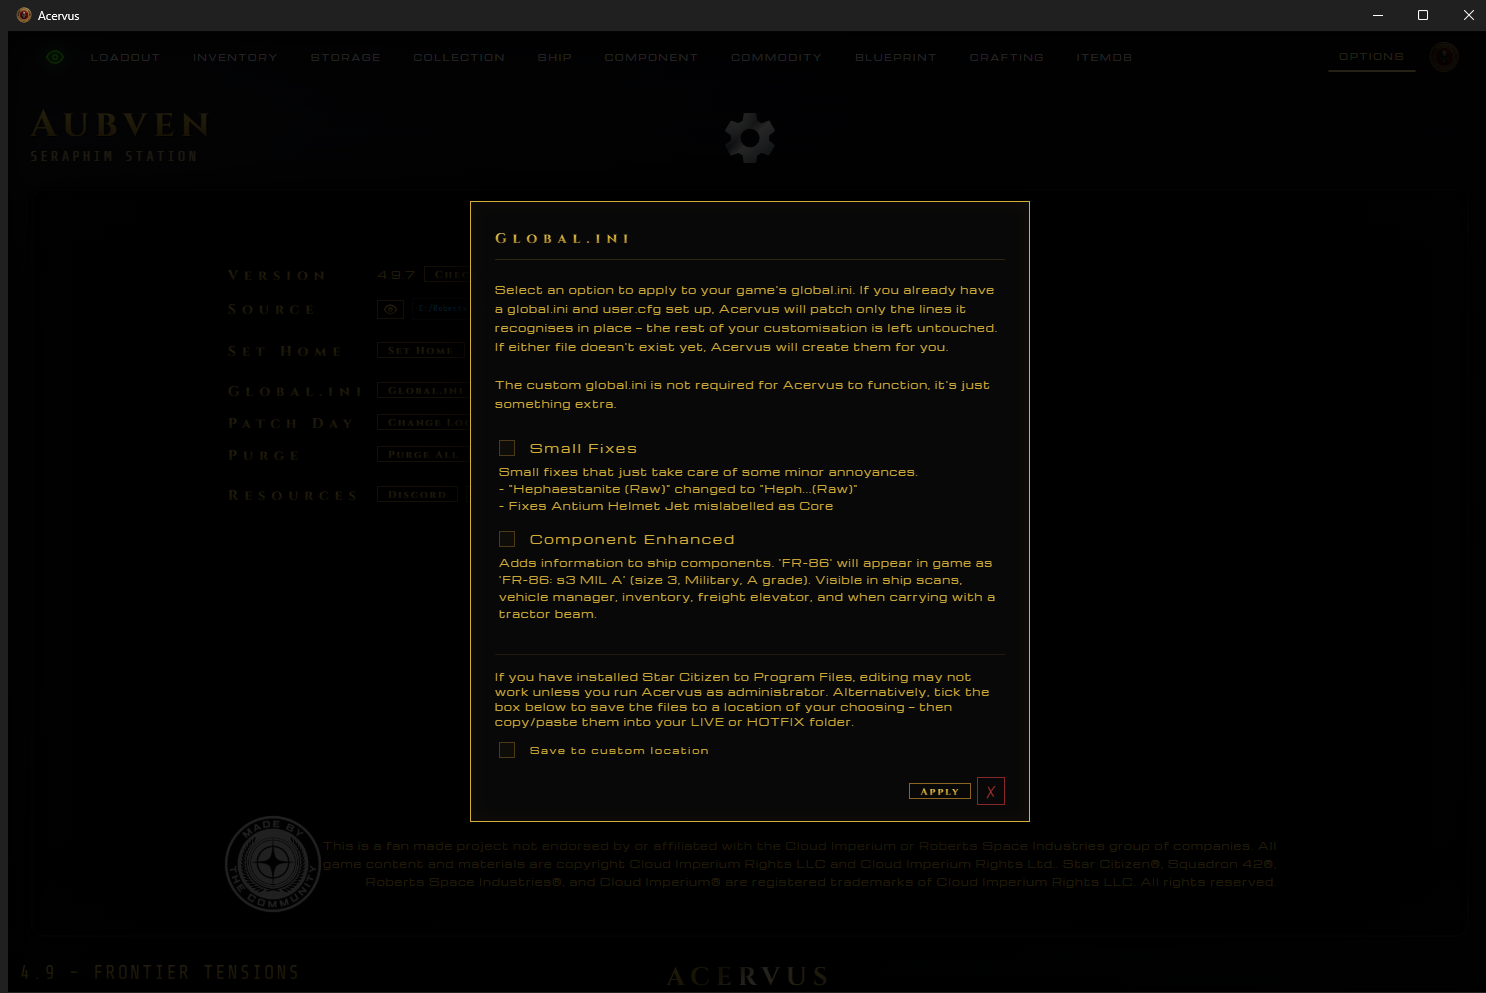
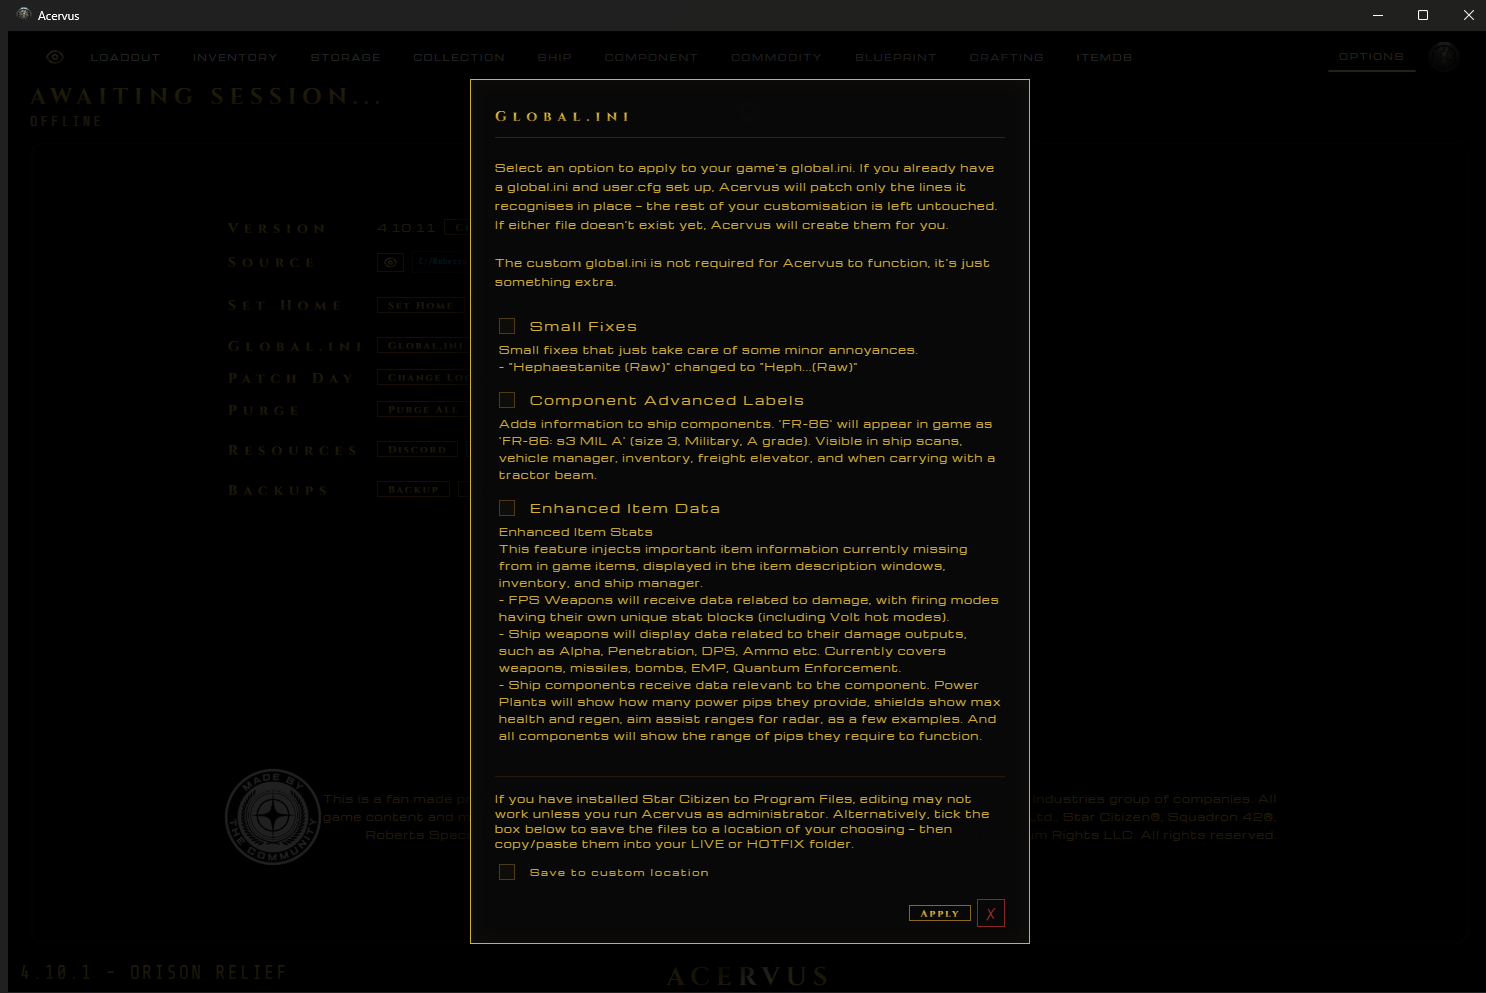
GLOBAL.INI: Customised language pack enhancements. These are not required for Acervus to function. The following information is injected into an existing global.ini and only effect the items within the scope of each enhancement. They can be used in conjunction with other custom made global.ini files.
"Small Fixes" minor QOL improvements such as fixing broken names, or shortening hephaestanite so it fits on the mining UI.
"Component Advanced Labels" adds a suffix to all components displaying extra info on size, type and class. 'FR-86' will now be displayed in game as 'FR-86: s3 MIL A'. In the case of missiles it will add their tracking modes (EM, IR, CS).
This extra information is visible when tractoring components, viewing inventory and freight elevator terminals, and ship customisation.
Component Enhanced currently updates Coolers, Shields, Power Plants, Quantum Drives, Jump Drives, Life Support, Quantum Enforcement Devices, Mining Lasers and Ordnance (missile, torpedo, bomb)
"Enhanced Item Data" injects important item data into in-game tooltips and mobiglass information screens which are currently missing.
- FPS weapons will have information for damage outputs, separated into blocks of data per Firing Mode. This includes Volt weapons overheat modifiers.
- Ship weapons gain their own damage output data blocks including Alpha and Penetration info. This covers all weapons from laser repeaters to ordnance and right through to EMP, QED and tool information on tractor beams.
- Ship components will now present relevant data you would expect to find on it. Coolers show cooling output, Power Plants display the amount of power pips they provide, radars have their aim assist ranges, and shields have their HP and regen stats to name just a few examples. And you can also see all their min/max power draws (how many pips they use).
PATCH DAY: A major patch day is here and everything gets moved to your home location. Acervus can accommodate this and will update all your items to the new Home Location. Or just nuke all non Hangar items because the patch deleted stuff and you need to start again.
PURGE: Does what it says on the box. Deletes everything, or choose certain categories to delete.